About Me

My photo
I enjoy cooking,eating food, being creative with food, and like to try new things. I try to avoid pre-packaged foods as much as I can.

Search This Blog

Sep 30, 2011

Cookies and Cream Bars

I know this is a little early for me blogging... I am taking a few minutes away from studying to go ahead and type up my blog so that it will be on time. I am driving home tonight, so I don't know when I'll get home. I am excited because I get to go to the Renaissance Festival and the apple orchard! Woohoo! It should be a pretty fun weekend... I just have to get my homework done sometime between today, Saturday, and Sunday. Teehee. Anyway, today is another dessert because my friend's going away party had 3 desserts... and they don't require an oven! Yea!

In the fridge
Cookies and Cream Bars


Ingredients:

  • 1 bag of white chocolate chips (12 oz I think... you could also use a different type of chocolate if you wanted to)
  • 16 oz cream cheese
  • 1 package of Oreo cookies
Instructions:


4 people ate half the pan!

  1. Put your oreos into a ziploc bag and smash them with a rolling pin, a spoon, your hands, or anything that can smash cookies. (watch for any rips in the plastic to avoid messes)
  2. After your cookies are smashed pretty well (there will be some chunks, but mainly a lot of crumbs and pieces smaller than a penny), pour them into a large bowl.
  3. Add your cream cheese on top of your oreos. Mix till combined (mixture will look gray-ish and have cookies all spread throughout).
  4. Press the cream cheese and Oreo mix into a pan or onto a plate. 
  5. Melt the white chocolate and cover the Oreo mix with it. 
  6. Put into the fridge for about 10 minutes to set. 
  7. Enjoy!

 It really is that simple. This doesn't require many ingredients, and it is so yummy! As always...

Bon appétit!

Sep 29, 2011

Rice Krispies

It is almost Friday! YAY! I am going home and going to the apple orchard and the Renaissance Festival. I am so excited! It will be a fun weekend. The drive is never fun, but that is why I have to sleep well tonight. I am gonna have a lot of laundry to do and dishes to do before I leave, but it's ok. Hehe. I persuaded 10 people to sign the interest sheet for the school in Scotland, woo! However, I am really, really, really tired. I have been running from place to place a lot today. Been nutty. Overall, a very good day. I think tonight is going to be an early night so I can get up early, shower, and study for my History of Europe exam. Blah. Anyway... todays' recipe is... (dun dun dun)...

Rice Krispie Treats


Ingredients:

  • 3 Tbsp butter or margarine (I like a little extra... call me weird all you want :P)
  • 1 pack (10 oz) of regular marshmallows or 4 cups mini marshmallows
  • 6 cups Rice Krispies (I used probably 4.5 - 5 cups and it was plenty!)
Instructions:
  1. Put the butter and marshmallows in a microwaveable bowl and microwave for about 1.5 minutes.
  2. Stir well and then add the cereal. Stir till well coated.
  3. Press into a greased (with butter or cooking spray) pan. 
  4. Let cool. Cut into squares and enjoy. 
I know it is super simple, but it is yummy and a nice treat that can easily be made in the microwave. 

If you want to make this on the stove... click here.  As always...


Bon appétit!

Fridge/Freezer Tour

Well, today has mostly been devoted to preparing for my friend's going away party. Not very many people showed, so I have way too much food leftover. Rawr. She did enjoy the surprise and thought it was sweet though. Made all my hard work feel a little less nutsy. However, my lack of sleep this week and all the crazy prep threw me behind in homework. Blah. So much to do. It also doesn't help that I have two extra things to add in to my crazy Thursday schedule. I get to talk about my time in Scotland and then get dinner with my friend. Fun stuff, but it still keeps me busy. Anyway... I decided that I'd go ahead and give a little picture tour of my freezer/fridge. I might take some pics of what is in my cubbies, but I haven't decided. Anyway... here's a peek into my fridge/freezer. :P
Lunch meat, cheese, leftover soup, and bread


English muffins!
All the important stuff, haha

Apples, water, pulled pork, and margarine for cooking

Tomatoes that are now in my fridge

Well, I hope that was a bit enlightening. Haha. I don't know if my fridge is "typical" but it definitely is a college students' fridge! As always...

Bon appétit!


Sep 27, 2011

Garlic Bread

Today was busy, and I am already drained. It's only Tuesday! I think that spells trouble for the rest of the week. I did get a chance to cut my nails though, but it feels weird typing without my nails clicking on the keys. My nails can never be too long because then I accidentally break, crack, or damage them... then they just look bad. Haha. So, today is a quick blog with an equally quick recipe. You can use a toaster oven, a real oven, or a microwave for this recipe.

Quick Garlic Bread


Ingredients:

  • butter/margarine
  • garlic salt  (you could also just use garlic butter instead)
  • parmesan cheese (optional)
  • bread (you can use french, a loaf of bread, or just a few slices of a certain bread that you have)
Instructions:
  1. Lightly butter your bread.              
  2. Sprinkle on garlic salt and parmesan cheese.
  3. Cook in microwave for 30 - 45 seconds.
  4. Enjoy!
Well, sorry for such a short blog, but I still have lots to do. Onward! As always...

Bon appétit!          
                                          Before cooking  
After cooking

Sep 26, 2011

Chicken Noodle Soup

I was going to make a delicious chili today... and then I realized that I don't have beef broth. I am very sad. Today has been decent overall, but it rained cats and dogs. No lie. Most of campus grass looks like it is a swamp. We got that much rain. I was fine under my umbrella and then a biker splashed me. I think I changed clothes at least 3 times today. Not cool, rain, not cool. However, it did inspire me to make my dinner tonight. Since I couldn't make chili, I made the next best thing... soup.

Chicken Noodle Soup


Ingredients: 

  • 1 can of condensed chicken broth (and one can of water.... or you can use homemade chicken broth)
  • 2 chicken breasts, cooked and cut into chunks
  • carrot slices (use as many as you would like)
  • celery (I would have used this but the grocery store was out!)
  • Half an onion, diced
  • salt and pepper, to taste
  • egg noodles
Instructions:
  1. Pour the chicken broth + water into a bowl or in a pot. 
  2. Add the noodles, carrots, onion, and celery. Cook till noodles are al dente.
  3. Spice with pepper and salt.
  4. Cook for another few minutes. 
If you would like an exact recipe... visit... here or here. I just had to use what I had on hand and I think it came out decent. I really wanted the celery, so hopefully when I make this again they will have it. 

As always...

Bon appétit!

Sep 25, 2011

Fiesta Black Beans (or bean dip)

So, I was going to blog yesterday... then I fell asleep after the football game that we barely lost. This week was too long. Blah. I am excited though, because I get to go grocery shopping in about 30 minutes! YAY! I desperately need groceries lol. When you have to eat PB&J, you know you are low on food. Anyway, I do apologize for my sleepy absence. So, I have something tasty today. It can be eaten two different ways... as a dip or just as is, but I made mine a dip to use with my tortilla chips.

Fiesta Black Beans (or Fiesta Bean dip)


Ingredients:

  • 1 can of black beans (I only ate half of this)
  • A few Tbsp. of salsa (I used mild)
  • 1/4 cup shredded cheese 
Instructions:

  1. Open the can of beans and dump into a strainer. Rinse well with water.
  2. Once your beans are rinsed, put them in a microwaveable container and microwave for about 3 - 5 minutes (if you want a dip, heat them longer so that the skin starts to peel off a bit). Make sure you stir your beans halfway through and make sure they are warm at the end.
  3. If you want a dip, mash your beans. If not, leave the beans as is.
  4. Put your cheese on top and pop into the microwave for 30 seconds. Stir.
  5. Add salsa and enjoy!
Cheap, easy, and something that almost anyone can make! Hope you all enjoy and please leave a comment! As always...


Bon appétit!

Sep 23, 2011

Scrambled Egg Sandwich

Yesterday I didn't blog. -.- The band got to play at the baseball game and we got home really late. I'll just use that as my excuse, along with mentioning that I didn't cook at all yesterday. It was one of those cereal days...
Speaking of cereal... I found one that I think tastes sour... Maybe it is just me and my messed up tastebuds, but I will definitely not buy this kind ever again!

See the yucky cereal picture:


So, I still have stuff that I could use to cook, but I really need to do dishes. It is a constant battle because I don't have a dishwasher and cooking tends to require dishes (or at least paper plates). Cereal can survive in a red plastic cup, but cooking scrambled eggs requires a bowl that can withstand heat. Speaking of scrambled eggs, they are the star of the dish I made today.

Scrambled Egg Sandwich


Ingredients:

  • 2 eggs per sandwich
  • milk or water (depends how you like your eggs)
  • 1 slice of cheese per sandwich
  • butter/margarine
  • 2 slices of bread per sandwich
Instructions:

  1. Get a frying pan out and put about 1/4 Tbsp. of butter in there. Melt it and move it around the pan.
  2. Put your 2 eggs and a splash of milk or water into a bowl. Whisk them till slightly bubbly or well combined.
  3. Cook your scrambled eggs over low - medium heat. Every few minutes, use a spoon to go around the outside of the pan and then zig zag along the inside, in order to prevent burnt eggs.
  4. Butter one side of each slice of bread and put a slice of cheese on one of the buttered sides.
  5. Put your eggs onto the side with the cheese, top with the other slice of bread (butter side onto the eggs), and then enjoy!
Time: about 10 minutes
****Note: you can also microwave your eggs****


 I like this sandwich because it allowed me to finish my liquid eggs and I love scrambled egg sandwiches! My mom used to make these for when we had brunch. It doesn't happen anymore, but I definitely still enjoy them. They are really easy to make and can be customized to the taste that you like. You can also toast the bread if you want to have a bit more crunch. I just lack a toaster here, so I have regular bread. :P

Well, as always...

Bon appétit!

Sep 21, 2011

Caesar Salad

Well, as the title says, I didn't cook today. I had too much on my mind and just went for some union food. I mean, I had oatmeal for breakfast, carrots with dip and chips with homemade guacamole for lunch, and am not eating my Caesar Salad with grilled chicken. Since the salad is the last thing I am eating for the day (and something I haven't posted a recipe about), I decided to link up some Caesar salad recipes.

Caesar Salad


Ingredients:

  • Lettuce (romaine preferably)
  • Croutons, optional
  • Grilled chicken (if you want it... or you could have shrimp or steak or something)
  • Grated Parmesan cheese
  • Caesar salad dressing (you can find the recipe here or here or you can search google)
Instructions:
  1. Combine all ingredients in a bowl.
  2. Toss together and serve.
Well, I know it isn't the most unique recipe ever, but it is a recipe! I hope you all enjoy, don't forget to spread the word about this blog, and as always...

Bon appétit!


<----- The guacamole I made yesterday!


Sep 20, 2011

Lemon Pasta

Tuesdays are evil days this semester. However, I got out early from class twice and I was able to do all of my dishes, make guacamole, and make a pasta I have been wanting to try. Yay! I've been perusing Facebook for more blogs and cooking pages. I can never have enough recipe ideas! I also have been trying to find inspiration for my dwindling food stuff. Trying to be creative with limited ingredients tends to mean things are repeated. Oh well. I have leftover pasta that I will probably have for 3 meals and I now have delicious guacamole dip for my tortilla chips. I think I need to just take an inventory of what I have and just go from there. Overall, today was long but not awful.

Since I made the delicious pasta today, I have decided to share it with all of you (granted there may not be many avid readers for this blog :P). I have to warn you, though, that I fudged the ingredients for what I had on hand. I used lemon juice and no peel, garlic salt with parsley, and guestimated on a lot of the ingredients.

Lemon Pasta (I promise it isn't as weird as it sounds)

Ingredients:

  • 8 oz. of cooked angel hair pasta, still hot (or a similar sort of pasta- I used the veggie pasta I had on hand)
  • 1/4 cup minced fresh parsley
  • 3 tsp. grated lemon peel (I skipped this)
  • 2 tsp. minced garlic or garlic powder or garlic salt
  • 6 Tbsp. olive oil
  • 3 Tbsp. lemon juice
  • 1/4 tsp. salt
  • 1/4 tsp. pepper
  • 1/3 cup grated Parmesan cheese
  • Tomatoes, diced (Optional- I just love tomatoes, so I added some sundried tomatoes... mmmm)
Instructions:
  1. In a large skillet, saute the parsley, lemon peel, and garlic in oil until garlic is tender.
  2. Add pasta to skillet.
  3. Sprinkle with lemon juice, salt, and pepper. Toss to coat.
  4. Sprinkle with parmesan cheese.
Yield: 4 servings

Once again, just use what you can and feel free to adjust this recipe to your tastes. I thought my version was pretty good for only using the microwave and some creative solutions. :)

Best of luck! As always...


Bon appétit!

P.S.: I found this video while I was searching for food videos. I have watched this video a few times and have been humming it almost all day. It's catchy! Although I don't agree that eating organic will help everything, it can help our body have less toxins (I try to buy the dirtiest produce organic: http://shine.yahoo.com/channel/food/10-dirty-fruits-and-veggies-2451593 but it doesn't always happen)

Sep 19, 2011

Choco Chip Butter Cookies

Well, today wasn't the best start to my week. I feel like I have sneezed at least 25 times today, and mostly in my dorm room. Am I allergic to my room? Or are my allergies just kicking into high gear today? I really do not know. All I know is that I have felt tired and icky all day. I am just hoping that it isn't a cold starting up. That would really suck. :/

Today has also been a problem for procrastination. I would much rather be watching Doctor Who than reading for 3 of my communication classes and figuring out ideas for group projects. Maybe it is just me, but I almost wish that these books could just zap into your brain somehow. It would be nice... Anyway.... I am going to quit whining and continue on to the recipe today...

I think this recipe is ok, but I don't know if I did something wrong or what. My mixture didn't come out as the directions said it should have. :/ I'm kinda clueless to what I did wrong, but maybe you all will have better results than I did. It's not that the cookies turned out bad, it's just that they didn't seem to be what they were supposed to be... I'l let you all judge for yourself, though.

Butter Cookies with Chocolate Chips


Ingredients:

  • 1 cup butter
  • 1/2 tsp. vanilla extract
  • 2 cups all purpose flour
  • 1 cup confectioners' sugar
  • 1 cup mini semisweet chocolate chips
Instructions:
  1. Preheat the oven to 375 F.
  2. In a microwave or heavy saucepan, melt the butter and then stir in the vanilla. Cool completely.
  3. In a large bowl, combine flour and sugar.
  4. Stir in the butter mix and the chocolate chips with the dry mix. (mixture should be crumbly)
  5. Roll dough into 1 inch balls. 
  6. Place balls 2 inches apart onto ungreased baking sheets (I used parchment paper) and flatten slightly. 
  7. Bake for 12 minutes or until edges begin to brown.
  8. Remove from sheets to cool.
Yield: about 4 dozen

Maybe I didn't cool the butter enough, or maybe I just had too many chocolate chips. I don't really know. I hope you all have better luck than I did and are able to make deliciously buttery cookies. :)

As always...
Bon appétit!

Sep 18, 2011

Mini Margherita Pizzas

 Perhaps it is just a college students point of view, but I think pizza is amazing. It can come in many shapes and forms and flavors. For that reason, I decided to make a simple recipe for my own pizza. I absolutely adore margarita pizza, so I wanted to have something similar to that.

Margarita Mini Pizzas


Ingredients:

  • Chopped tomatoes, optional
  • A few spoonfuls of sundried tomato pesto or tomato sauce
  • Basil leaves, torn (or basil pesto)
  • 2 English muffins, halved
  • Mozzarella cheese, torn into chunks
Instructions:
  1. Place the tomato slices (or tomato sauce/pesto), basil (or basil pesto) and mozzarella on the english muffin halves. 
  2. Pop into the toaster until cheese is melted or microwave until cheese is melty. 
  3. Enjoy!
Time: 10 minutes


So, even though all of my readers are probably not college students, I hope you all enjoy pizza. Really, you can use whatever sauce, cheese, and toppings on these. You could even use alfredo sauce, mozzarella cheese, and chicken to spice it up. The possibilities are pretty much endless with this simple recipe. I hope you all try it out and enjoy it. Please leave a comment with how it went and everything. Enjoy! As always...

Bon appétit!

Fruit and Cheese Danish

So, I added a link (see the right hand side of the page) to the Facebook page of "Cooking up Goodness Blog" so that everyone could go and check it out. Please like it if you would like and feel free to give some friendly tips or advice on how to make it better. :)

On other notes, the football team won their first home game, woo! That was exciting and definitely made the day go by fast. Band kind of sucked up all my time this afternoon, some of my morning, and most of my evening. However, I am blogging, so it didn't steal all of my time away. Muahahaha. Anyway, today I am going to be posting a sweet recipe. I have had the weirdest sweet tooth lately and I think it might be time to go ahead and buy coconut to get rid of my craving for that and Reeses. Yea, my healthy eating isn't always so healthy. I like my coconut and I like my chocolate. :D

However, this recipe sadly doesn't include chocolate or coconut. It is a still a smashing dessert (or I suppose you could eat it for breakfast too) and definitely worth the bit of time to make. Without any further flourishes, I bring you...

Fruit and Cheese Danish


Ingredients:

  • 1 tube (8 oz) refrigerated crescent rolls 
  • 4 TBSP. cream cheese, softened
  • 1 cup cherry pie filling (or apple or whatever filling you like... you could also use jam or jelly)
  • 1/2 cup vanilla frosting (optional)
Instructions:

  1. Preheat your oven to 375 F.
  2. Separate the crescent dough into 4 rectangles. Place on an ungreased baking sheet (you could use parchment paper) and seal the perforations.
  3. Spread 1 Tbsp of cream cheese onto each rectangle. Top with filling or jam or jelly of your choice.
  4. Bake for 10 - 12 minutes or until edges are golden brown. Cool for 5 minutes.
  5. Place frosting in a small microwave safe bowl and heat on high for 15- 20 seconds.
  6. Drizzle frosting over warm pastries. 
  7. Serve warm. Refrigerate any leftovers. 
Yield: 4 servings
Time: less than 30 minutes

I hope that you find this recipe as intriguing as I did. This didn't work out as well in the microwave as I had hoped, but it is a lesson learned. Please feel free to leave any tips or comments below once 
you try this recipe. Hope you all have a great day and as always...


 Bon appétit!

Sep 16, 2011

Tomato and Mozzarella Salad

So, that one day of crazy studying and some sleep was needed. I feel a bit more sane today, especially since my essay test is over with. It's been cold today, so I have tried to avoid prolonged exposure outside. I love fall and all, but not when my body is going numb...

I did 5 loads of laundry today (I had 3 of bedding alone -.-), cleaned my room, organized, and did all of my dishes. My parents are coming up to see me tomorrow for the football game and the cookout, woo! The only downside is that I have to keep up appearances for when they come.

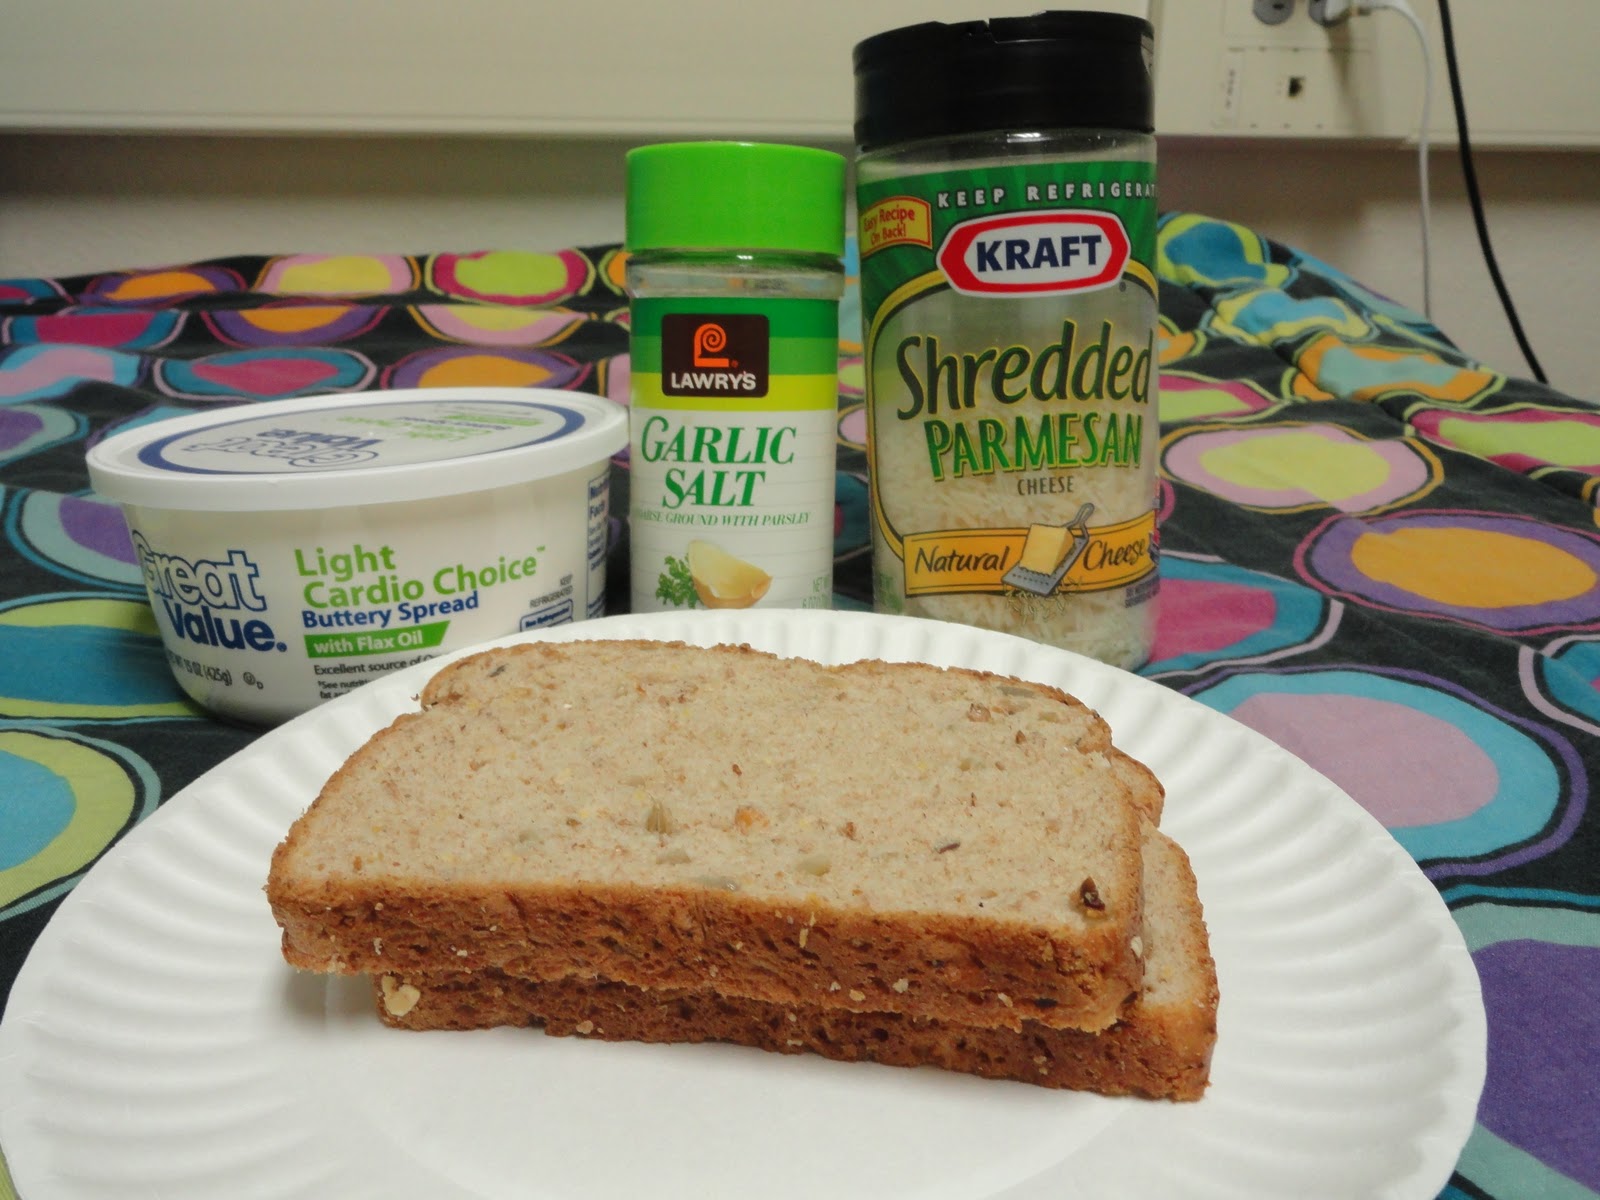
I ate lunch with one of my friends today and I had the mac and cheese. I had never noticed before how salty it is. Never again. Ugh, these new tastebuds from Scotland can be helpful, yet they limit a lot of pre-made foods. I can hardly eat popcorn anymore! It's just so salty. However, my new tastes have helped me develop my passion for cooking even further and start to cook real food in the dorm. Yes, it is different food than what I might make at home, but it is still good!

Some of you reading this might be thinking "Wow, she's crazy! How can she cook at college? She's so busy already!" and really, I am very busy. I just plan out my meals for the 2 weeks, and then make a shopping list for those recipes and some snacks. I made 3 shopping lists last time, because I saw that there were some other delicious recipes that I wanted to try as well. By having those other two shopping lists, I am prepared for my next two shopping trips already,  woohoo! I go shopping on Sunday every 2 weeks and keep it under 80 dollars. Luckily, that's only about $5.75 or so per day, which is decent in my book.

Anyway, now that we have discussed my habits and what I have been up to, let's move on to the star of the show... the food! I figured I would post another simple dish, especially since all of us experience those days when you don't really want to do much, or don't have much time to make and eat dinner. I promise you, this is a dish that is simple, only takes a few ingredients, and just is delicious!

Tomato and Mozzarella "Salad"


Ingredients:

  • 2 - 3 ripe tomatoes, diced
  • A chunk of mozzarella cheese, cubed (use as much or as little as you want)
  • Olive oil (for drizzling)
  • Basil (either dried or fresh), to taste
  • Garlic salt (optional)
  • Salt and pepper, to taste
Instructions:

  1. Put the diced tomatoes and mozzarella in a bowl.
  2. Drizzle Olive oil over it and stir.
  3. Sprinkle on the basil, salt, pepper, and garlic salt (if you are using it). Stir well.
  4. Enjoy!
I love this dish because it is so fresh and simple. It is tasty too! Too bad I am out of tomatoes at the moment or I would make it again. Mmmm. Hope you enjoy this recipe and as always...

 Bon appétit!

Sep 15, 2011

Is my brain still here?

I feel like this week has just drained me day by day. Between my not-so-good sleep schedule of this past weekend and the crazy amount of homework I have had, I am exhausted. However, I still have one more day to get through! Sadly, catching up on homework for classes means that something has to go for the day. Sadly, my blog is what I have chosen to sacrifice for today. I will leave everyone with a cooking quote, a sweet goodbye, and a promise that I will have another recipe for you all tomorrow. :)

"The story of barbecue is the story of America:  Settlers arrive on great unspoiled continent, discover wondrous riches, set them on fire and eat them."  ~Vince Staten


Lol, that quote just struck me as something that was amusing. Hopefully it isn't just my sleepy brain that finds it interesting/funny/amusing and whatnot. Eh. Anyway, goodnight to you all and I will have another tasty recipe for you all tomorrow. Till the morrow!


Bon appétit!

Sep 14, 2011

Mashed Potatoes with Corn and Cheese

Now, many of you would look at this dish and think that this couldn't possibly be dinner. Well, for me it was. I have leftover corn and mashed potatoes, but I did just eat this. At least it has veggies, right? Haha.

 Mashed Potatoes with Cheese and Corn


Ingredients:

  • 4 cups cubed, peeled potatoes
  • 1 and 1/2 cups water (or enough to cover the potatoes)
  • 3 TBSP. butter, softened
  • 1/2 tsp. salt
  • 1/4 tsp. pepper
  • 1 cup corn (canned or frozen), warmed
  • 1 and 1/2 cups (6 oz.) shredded cheese 
Instructions:
  1. Place the potatoes and water into a pan or microwave safe dish. Cook till tender. (microwave about 15 - 20 minutes)
  2. Place potatoes into a bowl.
  3. Mash with milk, butter, salt, and pepper. 
  4. Stir in corn and cheese.
Yield: 6 servings
Time: less than 30 minutes


Yep, that's the recipe. Does it look good? Want to try it? Feel free to leave a comment, especially if you do try it! Until tomorrow...

Bon appétit!


Sep 13, 2011

Peanut Butter Chip Cookies

I am sure that many of my readers have enjoyed the classic Peanut Butter Cookie. It's delicious on its' own, but even better with this twist!

Peanut Butter Chip Cookies


Ingredients:

  • 1 bag (12 oz) of white chocolate chips 
  • 1 bag (12 oz) of semi-sweet chocolate chips 
  • 1 bag (12 oz) of milk chocolate chips 
  • 2 cups butter, softened (4 sticks)
  • 2 cups peanut butter
  • 2 cups sugar
  • 1 and 1/3 cup packed brown sugar
  • 4 eggs
  • 2 tsp. vanilla extract
  • 4 cups all-purpose flour (plain flour)
  • 1 cup old fashioned oats
  • 4 tsp. baking soda
  • 3/4 tsp. salt
Instructions:
  1. Preheat the oven to 350 F (180 C). 
  2. In a large bowl, beat the peanut butter, butter, and sugars until light and fluffy.
  3. Add eggs and vanilla and beat well.
  4. Combine the flour, oats, baking soda, and salt.
  5. Gradually add the dry mix to the wet mix and mix well.
  6. Stir in the chips. 
  7. Drop by rounded tablespoonfuls 2 inches apart onto ungreased baking sheets (you can use parchment paper though!)
  8. Bake for 10 - 12 minutes or until lightly browned.
  9. Cool for 1 minute before moving onto cooling rack or wax paper for cooling.
Well, I hope you all enjoy this twist on the classic cookie and try it out for yourself! As always...

Bon appétit!

Sep 12, 2011

Chicken, Basil Pesto, Tomato, and Mozzarella Sandwich

Today was a bit of a crazy day. Then again, most of my college days are busy lol. I opted for a sandwich that I ate a lot in the UK. I found it absolutely yummy and I hope you will too.

Chicken, Basil Pesto, Tomato, and Mozzarella Sandwich


Ingredients:

  • Bread (preferably french, but whatever you have will work)- 2 slices per sandwich
  • Tomato slices
  • Basil pesto (if you would like to make your own, there's a recipe here)
  • Mozzarella cheese 
  • Chicken (I used the already cooked frozen kind, but feel free to cook yours with an Italian seasoning... like this recipe)
Instructions:

  1. Cook your chicken.
  2. Set out your bread, basil pesto, tomato slices, and mozzarella slices.
  3. Put the cooked chicken and mozzarella on one slice of bread and heat it up for 30 seconds to a minute to melt the cheese.
  4. Put the tomato slice(s) and basil pesto on the other slice of bread.
  5. Put the one slice on top of the other and enjoy!
I know this is a simple sandwich, but hey... it's yummy! Hope you try it out and as always...


Bon appétit!

Sep 11, 2011

Black Bean Tacos

I understand that we all are on a budget for food, and it is completely understandable. As a college student, I have to make certain choices and budget really well. The meal that I made tonight won't be too much of a dent in any budget. I was able to get a can of black beans for about 60 cents, and only used a third of the can. Also, many families keep shredded cheese and salsa in the house. The only thing you might have to pick up is a pack of tortillas. Whether it is for the family, or for yourself, this recipe is cheap and simple.

Black Bean Tacos


Ingredients:
  • One can of black beans, drained and rinsed 
  • 2 tortillas (or as many as you need)
  • Shredded cheddar cheese or cheddar blend or monterey jack or mexican cheese blend
  • Toppings: Salsa, tomatoes, lettuce, sour cream, etc.
Instructions:

  1. Microwave the beans for about a minute.
  2. Put beans and cheese on your tortilla.
  3. Microwave for 45 seconds.
  4. Add your toppings, roll it up, and enjoy!
Time: 5 - 10 minutes

Really, this recipe is something simple and is a great go-to recipe for those busy nights. Especially for a college student, this is perfect because it doesn't use any raw meat, pans, or a stovetop. Well, I hope you all enjoy and as always...


Bon appétit!
                                                                                                    My food is on a paper plate :P

Sep 10, 2011

Slow Cooker Tuscan Chicken

Ah, how I wish I was on a plane to Tuscany... there would be delightful food, my friend to meet up with, beautiful countryside... but I am stuck here. However, I can enjoy a dish that makes me feel as if I was travelling to Tuscany. So for today, here is the recipe for...


Slow cooker Tuscan Chicken


Ingredients:

  • 4 boneless, skinless chicken breasts (make sure they are thawed and not frozen!) 
  • 2 TBSP olive oil
  • 1 chopped onion
  •  ½ red bell pepper, diced
  • ½ green bell pepper, diced
  • 1 can (8oz or 220g) black beans, drained
  •  2 tomatoes, diced
  • 1 can of low-sodium chicken broth
  • 1 TBSP apple cider vinegar
  •  ½ tsp. dried oregano
  •  3 - 6 cloves garlic, diced (depends on how much you like) **I used the food processor to chop my garlic... just peel and put it in, pulse till chopped!**
  • Salt and pepper, to taste
Instructions:
  1.  Put the onion, peppers, and beans in the slow cooker.
  2.  Place the chicken on top of the vegetables and beans.
  3. In a bowl, stir together the olive oil, tomatoes, broth, vinegar, oregano, garlic, a bit of salt and pepper.
  4. Pour the mixture over the chicken.
  5. Put the lid on the slow cooker and set it to low.
  6. Let it cook for 6 to 7 hours.
  7. Serve over rice or pasta and enjoy! 
Servings: 4

I found the original recipe here, but I tweaked it a bit. This recipe is just fantastic! The smell while it was cooking was absolutely amazing! This dish is simple, and it has fabulous favor. I served this dish over rice and it was very filling. Definitely a recipe that I would make again!

“A cook she certainly was, in the very bone and centre of her soul. Not a chicken or turkey or duck in the bary-yard but looked grave when they saw her approaching, and seemed evidently to be reflecting on their latter end; and certain it was that she was always meditating on trussing, stuffing and roasting, to a degree that was calculated to inspire terror in any reflecting fowl living.”
A description of Aunt Chloe in 'Uncle Tom's Cabin' by Harriet Beecher Stowe (1852)

 As always...

Bon appétit!

Something a little different

I thought for today that I would do something a little different than what I have been doing. One of my friends asked me where the pictures were, and to be honest, I don't have pictures of everything that I have made. It is a sad thing, but I still want to share my favorite recipes with you all. Today, however, I am going to bring you a few cooking quotes that I fancy and a list of a few cookbooks that I recommend. It might not be the most exciting post, but it will be something different, for sure!

"We think fast food is equivalent to pornography, nutritionally speaking."  ~Steve Elbert


"One of the very nicest things about life is the way we must regularly stop whatever it is we are doing and devote our attention to eating."  ~Luciano Pavarotti and William Wright, Pavarotti, My Own Story


"A recipe has no soul.  You, as the cook, must bring soul to the recipe."  ~Thomas Keller


"My mom said the two most important kitchen utensils are attached to your arms... you cannot mix up meatballs with a wooden spoon, get in there, get your fingers dirty!"  ~Rachael Ray, Rachel Ray Show, original airdate 25 October 2007


Click here to see even more quotes about cooking. I like each of these because they all contain truth. It may not be truth that we want to face (like fast food), but we do know that regardless of what is said, we must have our own opinion. I shall let you all form your own opinion of all the mystery ingredients in the food that is eaten. Heck, I didn't even read labels for the longest time. This is why I am starting another blog (just to go along with this one) to explain things that we probably should all know, especially if we are cooking. I hope you all get the chance to check it out! 


On that note, here are a few cook book titles that I personally use and love:


  • Taste of Home: Simple & Delicious Cookbook 2nd edition (click this to be taken to Amazon to find your own copy, or just get an idea of what it has)
The recipes in the cookbook are simple and quick, which is excellent for our family. However, since we      have 2 picky eaters, it is hard to choose recipes. I would look at it and see if your family would enjoy the recipes or not. You might be surprised... I sure have!

  • Taste of Home: Cookies (click here to be taken to Amazon to look at this book)
Pretty much all of my cookie recipes have come from here. I absolutely adore this book, especially since it gives me the chance to experiment with new flavors of cookies and get out of the rut of typical cookies. Again, take a look at the book and see if it would be good for you or not. 

Hope you enjoyed this different post! As always...

Bon appétit!

Sep 8, 2011

Banana Crunch Muffins

Have you ever had one of those weeks that you hoped for Friday by Tuesday? Yep, that week was this week. Since I have been feeling like I am going bananas, I am posting a banana recipe.

Banana Crunch Muffins


Ingredients:

  • 3 cups all purpose flour
  • 2 cups sugar
  • 2 tsp. baking powder
  • 1 tsp. baking soda
  • 1/2 tsp. salt
  • 1 cup butter, melted and cooled
  • 2 eggs
  • 3/4 cup milk
  • 2 tsp. vanilla extract
  • 1 cup mashed bananas (2 bananas)
  • 2 bananas, diced
  • 1 cup chopped walnuts
  • 1 cup granola 
  • 1/2 cup raisins (optional)
Instructions:
  1. Preheat oven to 350 F (177 C).
  2. Sift flour, sugar, baking powder, baking soda, and salt into a bowl.
  3. Add the butter to flour mix and blend.
  4. Combine eggs, milk, vanilla, and mashed bananas and add to flour/butter mix. Blend well.
  5. Fold in diced bananas, walnuts, granola, and raisins.
  6. Spoon into a muffin pan (grease it or use muffin cups).
  7. Bake for 25 - 30 minutes or until tops are brown and a toothpick comes out clean.
Serves: 18 muffins
Prep: 45 minutes

Bon appétit!

Sep 7, 2011

Applesauce

Today was relaxing, luckily. Tomorrow is another insane day so I am gearing up for the chaos. In the mean time, here is a recipe that is simple and yummy! Then again... I just love applesauce, haha.

Homemade Applesauce


Ingredients:

  • 4 apples, peeled, cored, and chopped
  • 3/4 cup water
  • 1/2 tsp. cinnamon
  • 1/4 cup sugar
Instructions:
  1. Combine the apples, water, sugar, and cinnamon in a sauce pan.
  2. Cover and cook over medium heat for 15 - 20 minutes or until apples are soft.
  3. Mash the applesauce with a fork or potato masher when slightly cooled. Mash until you reach the desired consistency. 
  4. Enjoy your delicious applesauce!
I like to make a triple or even quadruple batch and I love eating it fresh from the pan. Soooo yummy! Hope you try it out and as always...

Bon appétit!

Sep 6, 2011

Garlic Pasta with Parmesan and Tomato

Today was absolutely exhausting. Why does it always seem to be like that after holiday long weekends? I can only assume it is because I catch up on so much other stuff. Anyway, today is going to be a simply delicious pasta dish. It is something that I actually just created in my dorm room! What can I say... you have to be inventive sometimes.

Garlic Pasta with Parmesan and Tomato


Ingredients:

  • 1 box of pasta
  • 2-5 tomatoes, diced
  • Garlic salt
  • Pepper
  • Parmesan cheese, grated/shredded
Instructions:
  1. Cook your pasta according to directions. 
  2. Dice your tomato and put it over your serving of pasta.
  3. Add a sprinkle of garlic salt and pepper. 
  4. Garnish with Parmesan cheese.
  5. Enjoy!
Serves: 1
Time: 10 minutes

Well, I hope you enjoyed my simple and delicious recipe! 


As always...


Bon appétit!

Sep 5, 2011

Bruschetta: A tasty appetizer

Labor day was crazy for me. I had so much to do and so little time. I hope everyone else got to relax more than I did. Hehe. Today I am bringing you a recipe that is simple, tasty, and quick! You can prepare this around 10 minutes before your guests come (or less time).

Bruschetta

Ingredients:
  • A few gloves of garlic, chopped into small pieces (I like using the food processor. Just peel the garlic, put it in, and poof, chopped garlic.)
  • A few Basil leaves, torn 
  • Drizzle of olive oil
  • Tomatoes (about 4), diced
  • Crusty bread, cut into 1/2 inch slices (I like french bread.) You will use anywhere from 1/2 loaf to 1 loaf of bread, depending on how many people you have. 
  • Parmesan cheese (the fresh kind!), shaved into large slices
Instructions:
  1. Slice the bread into 1/2 inch slices.
  2. Put the slices in the oven or on the grill for about 2 minutes or until toasted. (You could even use a toaster)
  3. Mix tomatoes, garlic, basil, and the drizzle of olive oil.
  4. Spoon the mix and a slice of Parmesan cheese onto the bread and enjoy!
** you can also heat the bread with the Parmesan cheese on it before adding the tomato mix**

As always...

Bon appétit!

Macaroni and Cheese with Ham

So, today was another hectic day. Then again, every time I come home for the holidays, it is always hectic here. Hopefully I helped to iron out everything... I can smell the chicken that I put in the slow cooker from my room upstairs and it smells heavenly. I hope it tastes as good as it smells! The recipe for today is something that is filling and downright delicious.

Macaroni and Cheese with Ham


Ingredients:

  • 2 TBSP of butter
  • 1 TBSP and 2 tsp. of flour
  • 1 cup milk
  • 1 cup shredded cheese
  • 2 cups pasta, freshly cooked and still hot
  • 1/2 tsp. salt
  • 1/2 tsp. pepper
  • 1 and 1/2 cups cooked and diced ham
  • 1 TBSP mustard (I like honey dijon)
Instructions:
  1. Preheat the oven to 350 degrees F. 
  2. In a saucepan, melt the butter and then add the flour. Stir till mostly smooth and bubbly. 
  3. Gradually stir in the milk. Continue cooking and stir until the sauce bubbles.
  4. Add the cheese to the sauce, along with the salt, pepper, and mustard.
  5. Stir in the ham, and pasta. Mix well.
  6. Pour into a baking dish.
  7. Sprinkle a little extra cheese over the top.
  8. Bake for 20 - 25 minutes.
Serves: 4
Prep: 45 minutes


I hope that you all enjoy and as always...

Bon appétit!

Sep 3, 2011

Easy Guacamole

Yesterday didn't go as planned. I got home and my brother was the only one there. Figures. I did a lot of thinking on the way home and tried to plan out my blog post for the night... except that I couldn't connect to the internet at home. Ugh. Messy. So, this afternoon I bring you a recipe that is simple and will allow you to chill.

Easy Guacamole


Ingredients:

  • 2 ripe avocados
  • 1/2 red onion, cut into quarters
  • 1 clove garlic
  • Salt and pepper to taste
  • 1 lime, juiced
  • 2 TBSP cilantro leaves (optional)
  • 1 ripe tomato, chopped (optional)
Instructions:
  1. Get your food processor ready.
  2. Peel the avocado. (Suggestion: Cut the avocado in half and push on the outside skin to get the flesh off. If you need to, scrape whatever flesh is left.)
  3. Put the avocado chunks, quartered red onion, garlic, and cilantro (if you are using it) into the food processor. 
  4. Pulse until it reaches the desired consistency.
  5. Put into a bowl, cover with plastic wrap and wait 30 minutes to allow flavors to blend. 
**note: I like to also add a few Tablespoons of mild salsa to my guacamole, but everyone will like it different.**

Time: 40 minutes (including chilling time)

Since I know that everyone likes their guacamole a different way, I am including: Perfect Guacamole RecipeEasy Guacamole Recipe  (The comments are helpful!), and Another Guacamole Recipe. I hope you are all able to find a recipe that you enjoy! Have a great day and as always...

Bon appétit!

Sep 1, 2011

Buttermilk Waffles

So today I was thinking about my blog and I started craving breakfast food. Weird, right? Well, it has influenced my decision for the recipe tonight. You can view the original recipe here


Buttermilk Waffles


Ingredients:

  • 2 and 1/4 cups all-purpose flour (plain flour)
  • 1 tsp. baking soda
  • 2 eggs, beaten
  • 2 cups buttermilk
  • 1 tsp. vanilla
  • 8 TBSP butter, melted
  • 1 tsp. salt
  • 1 tsp. baking powder
Instructions:

  1. Mix together the flour, salt, baking soda, and baking powder.
  2. Add the eggs, buttermilk, melted butter, and vanilla to the dry mix. Stir well.
  3. If the batter is too thick, add a tablespoon or two of buttermilk. If the batter is too thin, add a tablespoon or two of flour. Stir to mix.
  4. Pour batter into preheated waffle iron and cook until crisp and golden. (a few minutes each)
This makes a lot of waffles!

I doubled this recipe and was able to put at least 3 gallon size bags full of waffles into the freezer (even after feeding the family). Nom nom nom. Well, I hope you all enjoy the recipe today and as always...


Bon appétit!