About Me

My photo
I enjoy cooking,eating food, being creative with food, and like to try new things. I try to avoid pre-packaged foods as much as I can.

Search This Blog

Showing posts with label microwave. Show all posts

Oct 27, 2013

Double Trouble Fudge

Alright... I fail at blogging. To sum things up... the months went by way too fast!

August: We went to Florida to visit some relatives and that went well. We returned and well, it was busy. My sister packed for college and completed her summer assignment. We all chipped in to help her pack and prep for this new chapter of her life. It is strange and I felt really old sifting through my college bins that have sat in the basement for 2 years. It made me walk down memory lane, and really reminded me of how much I miss college...

September: I interviewed for two job positions and applied for a few more. I have been very lucky and I was hired at one of the places I interviewed. Yay for a job!

October: I have been working my butt off. People can be so frustrating sometimes. Retail makes you see plenty of the bad side of humanity. Honestly. Working retail makes you go on a rollercoaster of emotions throughout the day. As an introvert, this job seems to require all of my energy. By the end of the day I am totally exhausted. Gotta work to earn money for grad school though! Now if only I would stop shopping the clearance and finding way too many clothes...

Anyway, the recipe for today reminds me of a reese peanut butter cup. It has the saltiness from the peanut butter mixed with the sweet chocolate and sweet and salty combinations just work so well (and they taste so good!). This would be a great treat for Christmas or even a Halloween party! I hope you try this treat!


Double Trouble Fudge (from Feathers in Our Nest)

Ingredients:
  • 1 tsp. butter
  • 1 cup peanut butter chips (find them in the baking aisle)
  • 1 can sweetened condensed milk, divided (see recipe for more details)
  • 1 tsp. vanilla extract, divided (1/2 tsp. for each layer)
  • 1 cup of semisweet chocolate chips 
Instructions:
  1. Line a square pan* (8x8 or so) with foil/parchment paper/nonstick spray/butter. If you do not use something heavy duty then it will be difficult to get the fudge out later. Trust me. 
  2. In a microwaveable bowl, combine the cup of peanut butter chips and 2/3 cup of the sweetened condensed milk. 
  3. Microwave for 1 minute and then stir the mixture. Microwave in 15 second increments after the initial minute until the mixture is smooth. Make sure you stir after each time in the microwave so the mixture doesn't burn!
  4. Stir in 1/2 tsp. of vanilla extract and then pour the first layer into the pan.
  5. Place your pan of fudge mixture into the fridge for 10 minutes.
  6. After you have refrigerated the fudge for 10 minutes, start making the second layer.
  7. In a different microwaveable bowl, combine the semisweet chocolate chips and the rest of the sweetened condensed milk. 
  8. Repeat step 3 as described above.
  9. Stir in 1/2 tsp. of vanilla extract and then pour the chocolate layer over the semi-solid peanut butter layer.
  10. Refrigerate your fudge for 1 hour to let it firm up. 
  11. Remove the fudge from the pan and cut it into small squares.
  12. Store in the fridge until serving.
  13. Enjoy! 
*You could also use a square candy mold or use a mold with a removable bottom. 

I hope you test this fudge out and find out how delicious and easy it is! 

Have you made homemade fudge before? What did you think? Let me know with a comment below! 


Love it? Hate it? Want to make it? Comment and let me know what sort of recipes you want to see next!

As always...

Bon appétit!


Follow me on Pinterest.
Follow me on Facebook. 

Aug 14, 2012

Apple Dessert

Hey there! I have returned! Woo. The family cruise was enjoyable and Key West was awesome. However, there is no place like home. The only downside to being home is the fact that reality is kicking in. Many of my college friends are getting ready to move in and I am.. well... not. I have a tutoring job for the school year, but my parents do not consider that enough of a job. I am being tossed job listings and told to find a second job. Goody. I really don't have a problem with work if it is something I am passionate about, but busy work bores me. Guess I will be in for a bigger dose of reality, huh? Haha.

This odd transition is one of those things that probably trips up many new college grads. I have considered going to grad school or perhaps getting a bakers certificate or going to a 1-year cooking school, but right now all of these items are too costly. I want to start my own at-home baking business, but that was vetoed by my mother. Guess that will wait till I have an apartment then. I don't quite know what I would go to grad school for if I went. I was thinking business, entrepreneurship, or perhaps communications with a focus in Myers Briggs stuff. I could even go for my associates in entrepreneurship at the community college and choose something else for my masters degree. I just have a lot of options and it is a bit overwhelming. For now, I will continue to enjoy baking and cooking and search for a 2nd job to start saving money.

Well, now that everyone knows about the weird college transition phase, it's time for a recipe. This recipe is one that I created when I was in college and could only use a microwave. It's simple and requires ingredients that most people probably keep in the house. It's simple, easy, and delicious!

Microwave "Apple crisp"

Ingredients:

  • 1 apple, peeled (if you want them peeled), cored, and cut into chunks
  • 2 Tbsp. oatmeal, uncooked
  • 1/4 - 1/2 cup water
  • couple pinches of cinnamon, or to taste
  • 1 - 2 Tbsp. brown sugar
Instructions:
  1. Combine 1/4 cup water and the apple chunks in a microwave safe bowl.
  2. Microwave for 30 seconds, and then check the apples and water level. There needs to be a small amount of water at the bottom to help the apples cook. If needed, microwave up to 1 minute more.
  3. Add the oatmeal, brown sugar, and cinnamon.
  4. Microwave another 45 seconds.
  5. Stir and enjoy! 

You can add other toppings like nuts, seeds, or dried fruit if you would like. Another delicious addition would be vanilla bean ice cream or whipped cream. Mmmm. I found this to be delicious by itself, but feel free to play with the recipe! The microwave times are approximate because every microwave is different. You also could just dump it all into the bowl and microwave till the apples are soft and the oatmeal is slightly cooked, if you wish.

Love it? Hate it? Want to make it? Let me know what you think with a comment below!
As always...

Bon appétit!


Mar 17, 2012

Microwave cheese sauce

I am back! The last two weeks have been a bit crazy. My grandpa ran into some issues, so I had to run the house while on my spring break. Coming back to school was nutty, especially since my sleep schedule was messed up royally. I have finally reeled everything in and am now back to semi-decent schedule. I was happy to have a cancelled class today, because it gave me more time to myself. The weather has been absolutely gorgeous lately. However, the school seems to think the heating still needs to be on. I don't understand it.

Another thing that I realized today is I am 7 weeks from graduation. Eek! It's scary yet exciting, and I know I need to get going on my resume by going to Career Services so they can help me out. I watched a new series called Fairly Legal. It's interesting and I like it so far. I've been watching movies lately and am trying to shrink my "want to watch" list down quite a bit. We'll see how well I do.

Even though life is throwing curve balls at me, I still have found time to cook and create new stuff. The recipe today is a simple cheese sauce that can be made in the microwave. I used this cheese sauce to make my cheesy corn dish. This sauce could be used over anything that you want cheese sauce on, really. I hope you like it!

Microwave Cheese Sauce (recipe from Food.com)

Ingredients:

  • 2 Tbsp. butter
  • 2 Tbsp. flour
  • 1 cup warm milk
  • 1 cup shredded Cheddar cheese
  • 1/2 tsp. salt, optional
Instructions:

  1. In a large microwaveable glass bowl, heat the butter for 30 seconds. Stir and then microwave in 10 second intervals until melted.
  2. Add the flour to the melted butter and whisk well.
  3. Add in the warm milk and whisk again. 
  4. Add in the cheese.
  5. Place the bowl back into the microwave. Heat for a total of 1.5 - 2 minutes, but whisk after 30 seconds. (3-4 sets of 30 seconds)
  6. The sauce should be thick and heated through.
  7. Add the salt if you want to and whisk until blended.
  8. Pour over what you wish and serve.
I hope you all enjoy this simple recipe for cheese sauce. It is a plus that it's made in the microwave. The taste of this cheese sauce is decent and is versatile for whatever mix ins you might want to have. Hope you try this out!

Love it? Hate it? Want to make it? Let me know what you think with a comment below!

As always...
Bon appétit!

Jan 17, 2012

Sweet n Sour Chicken: It's my birthday!

3-day weekends always seem to be the busiest for me. That is probably why I had to get up at 4 am (I left at 4:45 am) to drive back to school. I made good time and arrived on campus about 8:15 or so. I then had Environmental Sociology, which was interesting. We talked about nature and our relationship to it, our perceptions of nature, etc. It was something new that I hadn't ever thought about. I am currently waiting for my friend from Scotland who said he would be on at 11:30 am my time. Then again, scheduled times tend to be relative. So I shall just blog while I wait, haha. Oh, it's my birthday! Officially 22 o.o

An overview of my 3 day weekend.
Friday: too snowy to drive home, so I spent the night at the dorms.
Saturday: Had to be up at 5 am to go home. Roads were clear (thank goodness!). Dropped off my car to get new tires and later picked it up again. Played Plants vs. Zombies with my brother. Played Disney Quest with my brother and sister. My brother kept killing us!
Sunday: Slept in till noon. Went to Cheesecake Factory for my birthday dinner (no cheesecake allowed though!) and ordered the Fettuccine Alfredo with sundried tomatoes and chicken. It was alright, but I liked my moms' Thai Chicken Noodles better. Peanut sauce = mmmmm. Ate cake and opened my present. Played Plants vs. Zombies with my brother. Dropped my sister off for a sleepover.
Monday: Went to the doctor for a check up. Picked up my sister from her sleepover. Took a nap. Went to the grocery store. Made dinner. Cleaned up from dinner. Had leftover birthday cake. Took a shower and went to sleep.

That brings us up to date with my life right now. Of course, the Facebook birthday wishes keep rolling in. I wonder how many there will be at the end of the day, haha. I figured that all of you are probably ready for a break from all the sweets I've been posting, so I have the recipe that I made yesterday. Sweet and Sour Chicken! It was tasty, easy (it's done in the microwave!), and even though we didn't have pineapple, it was still delish. My brother had a double helping, while my dad and sister enjoyed their serving. I found out that my mom doesn't like sweet and sour chicken, but we still had leftover food, so she had steak and rice. I brought some of the leftover chicken with me, hehehehe. I hope you try this recipe out!

Sweet and Sour chicken (adapted from BBC Good Food)

Ingredients:

  • 9 Tbsp. tomato ketchup
  • 3 Tbsp. malt vinegar 
  • 4 - 6 Tbsp. brown sugar (it depends how sweet you like your sauce. I added a little over 5 Tbsp.)
  • 2 garlic cloves (2 of the "sections" of the garlic), crushed or finely chopped
  • 4 skinless, boneless chicken breasts, cut into chunks
  • 1 onion, chopped
  • 2 peppers, seeded and chopped (I used one red and one green)
  • 8 oz. can of pineapple chunks, drained (you can drink the juice!)
  • 100 g sugar snap peas, roughly sliced, optional
  • Handful of roasted cashew nuts, optional
Instructions:
  1. In a large microwaveable dish, mix the ketchup, vinegar, sugar and garlic thoroughly. 
  2. Add the chicken, onion and peppers and stir. 
  3.  Microwave, uncovered,  for 8-10 minutes until the chicken is starting to cook and the sauce is sizzling.
  4. Stir in the pineapple pieces and the peas if you are using them. 
  5. Microwave for another 3-5 minutes or until the chicken is fully cooked. 
  6. Leave to stand for a few minutes and then stir in the cashews if you are using them.
  7. Serve while warm. (I served this with white rice)
Malt vinegar is able to be found in the stores. It might have a British flag on it, though. The other ingredients are easy to find. You can personalize this dish with other vegetables that you enjoy, as well!

Love it? Hate it? Want to make it? Let me know what you think with a comment below!

As always...
Bon appétit!


P.S. : My current band obsession is The Wanted. If you haven't heard their music, check them out!


Jan 11, 2012

A microwave brownie from scratch

I think I am becoming a cranky college senior. The people upstairs keep tapping on the heating unit and heating pipes, and then the sound is amplified into my room. I have started tapping really loud on the heater just to get a few minutes of peace. My next door neighbor has her loud friends over even more than usual, and it seems that she has their kids over plenty, too. She's nice, but when I can hear you returning to your room past 2 am and I hear "Hey gurrrllll..." I just want to hurt something. They have been warned before, but apparently the memo hasn't completely gotten through their heads. Ugh. Does this make me a grumpy senior student or just too observant? I haven't quite decided... Classes went well today. My media writing class felt like elementary school English class. We discussed differences between illicit vs. elicit, allude vs. illude, illusion vs. allusion, media vs. medium, and many more. It wasn't difficult, but my brain checked out quite often. Ugh, there goes the noisy hall people again. SHUSH PEOPLE! -.-

I read my chapter for environmental sociology. It was boring and I didn't really learn much other than the reason why the authors put the book together the way they did and what was in the chapters to come. They went over some history, but I don't think I care enough about that. I finally installed Itunes on my new computer. For some reason I thought I had already installed it, but I hadn't. Itunes is needed so that I can make a driving playlist for my round trip driving session. Seven to eight hours in the car in one day. Yay me. I also have to type up my idea sheet for the ACS meeting tomorrow. The meeting is why I have to spend so much time in the car, along with the fact that we have school on Friday, even though many other schools get a 4 day weekend. Unlucky us. I might try to get my reading done tonight or tomorrow, but it might have to wait till late tomorrow night or something. Pretty much life right now.

So, this recipe is one that I randomly found on Pinterest. I know that I have posted a microwave brownie recipe before, but this one doesn't use the boxed brownie mix. This is delicious and I honestly don't understand the complaints that are in the comments section. If you need a quick chocolate fix, this is for you!

Mug Brownie from scratch (from Instructables.com)

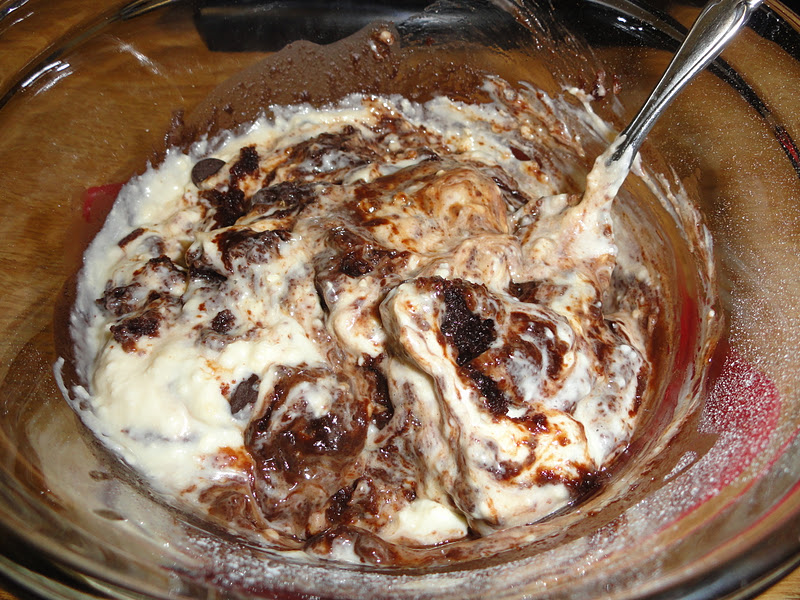
I added cheesecake dip and choco chips to my brownie. So good!
Ingredients:

  • 4 Tbsp. Flour
  • 4 Tbsp. Sugar
  • 2 Tbsp. Cocoa powder (what you would use for baking)
  • Dash of salt
  • 2 Tbsp. Vegetable Oil (or any non-flavorful oil i.e. safflower, sunflower, canola, etc.)
  • 2 Tbsp. Water
Instructions:
After stirring. It was still delicious!
  1. Mix the first 4 ingredients together (dry ingredients).
  2. Add the last two ingredients (liquids). 
  3. Mix well. Try to get out many of the clumps.
  4. Microwave for 30 seconds. Test and see if done.
  5. If not done, microwave in 30 second intervals until it is done. It won't look done, but it will have more-done brownie on the edges and more gooey in the center. If you mix it together it will be just fine.
  6. Add any toppings you would like (whipped cream, chocolate chips, etc) and enjoy warm!
I hope you try this out. It's simple and fast! I like it when I desperately need some chocolate in my life. If you want to see the recipe for the cheesecake dip, click here.

Love it? Hate it? Want to make it? Let me know what you think with a comment below!
As always...
Bon appétit!

Nov 13, 2011

A quick post: Microwave brownie dessert

Alrighty, this is going to be a quick post. Our football team won, woo! This week has been crazy and I don't want to do homework haha, but it is necessary. My parents were here this weekend, so I had dinner with them yesterday and breakfast with them this morning. I went to bed at like, 9:30 pm on Saturday. I was absolutely exhausted. This week hasn't been a week of very much sleep, and getting up early on Saturday was not my ideal Saturday. I am still working on my list of homework, but it has diminished quite a bit. Once I finish the weekend list, I might start on the Monday list. We shall see though. I will soon be running to the grocery store to stock up on some fresh fruit and vegetables, along with some items for the event that I am planning. Planning this event in such a small span of time wasn't the best idea, but it is what it is. I have a mountain of dishes to do today that I am not looking forward to doing. I really need to start washing dishes as I use them... Hmm, that's pretty much everything in a nutshell.

So, today's recipe was a bit of an experiment. I had an immense chocolate craving and I had a box of brownies. I knew that people had made cake in the microwave before, so I figured brownies could work too. Well, they sorta did. After heating, it seemed more like a brownie dip rather than brownies. However, once they cooled for a bit, there was the consistency of fudgy brownies. Mmmm. Tasty. Anyway, here is the key to yummy microwave brownie-ness.

Microwave Brownie Yumminess
Do you see the smile?


Ingredients:
  • 1 box of brownie mix
  • whatever the box of brownies calls for (normally 2 eggs, 1/2 cup of veg oil, and 1/4 cup of water or so... it could vary, but those are the ingredients)
  • whipped cream or cool whip for topping (optional)
  • chocolate chips for topping (optional)
  • any other toppings (optional)
Equipment:
  • 1 microwaveable bowl, preferably a microwaveable mixing bowl or microwaveable baking dish
  • spatula
  • whisk
See it now? :)
Instructions:
  1. Prepare the brownie mix according to the box directions. Make sure you whisk well so that lumps are to a minimum. 
  2. If transferring the mix to another bowl or dish, make sure you lightly oil or butter the sides of the other dish. Use the spatula to get all the mix out of the first bowl. If you are keeping it in the same bowl, it will be fine as is.
  3. Heat the brownie mix for about 2 minutes on High. Stir. Keep heating in 1 minute intervals, until the bottom is still a bit mixy and the top is slightly cakey. 
  4. When it is done, the mix will absorb into the cooked portion when stirred well. If you want cake-like brownies, heat a bit longer. 
  5. Spoon out, add any toppings you'd like, and enjoy!


This was so yummy! I am glad that it worked. I enjoyed my brownie goodness with some cool whip and chocolate chips, and a nice cup of milk. Mmmm. The leftovers from this didn't last long, haha. Well, if you have a craving and don't feel like using the oven, this is simple and quick! Enjoy!

As always...


Bon appétit! 

Oct 12, 2011

My room smells like Lasagna now...

I don't think my body understands how much I have to do this week. Yesterday I wanted to take a little nap at about 9:50 pm. However, my body decided that it was bed time... Needless to say, I never did make my dinner and I didn't blog either. Sadness. This week has already had a few crazy days, so if I happen to miss any more blogs this week, I apologize in advance. It is the week before midterms and I feel like there should be 3 of me in order to get done all the work that I need to. As I am writing this blog (at 10 pm), I am currently eating "dinner" consisting of tomato and mozzarella salad. If you haven't seen that recipe, please click the link and you will be taken to that blog entry. Honestly, it is so good that I could probably eat it for days! But yea, this week is homework, homework, more homework, slight break, and... you guessed it... more homework. Oh the life of a college student, lol. I was thinking earlier that maybe once every 2 weeks or once every month I could record myself making the recipe and post it on Youtube. Sound interesting to anyone?

As you have probably guessed, today's recipe is lasagna. If you are looking for an oven lasagna, please look at lasagna recipe or veggie lasagna . The links will take you directly to my previous posts about my delicious oven lasagna. However, I made a microwave lasagna. Sound interesting? I hope so!

Microwave Lasagna

Ingredients:
Before Cooking
Before cooking
  •  4 cups homemade or purchased marinara sauce (Italian Garden Sauce for me)
  • 1 tsp. dried oregano (Optional)
  • 1 handful fresh basil, chopped (I used a few tsps. of dried basil)
  • 1 sandwich baggie full of washed spinach (I used less than the recipe itself called for, and my Spinach was mixed with Arugula)
  • 1 garlic clove, peeled and minced (or you could use some garlic powder... the garlic salt was a bit much)
  • 1/2 cup water
  •  1 8 oz box of no-boil lasagna noodles
  • 1 cup ricotta cheese (8 oz)
  • 1 egg ... could be left out... The store ran out of the eggs I use! :-(
  • 2 cups shredded Cheddar or jack cheese (I only used about a cup)
  • 2 cups shredded mozzarella cheese (I got the big block of mozzarella and used 3/4 of it)
Instructions:

After cooking

  1. In a large bowl, stir together marinara sauce, oregano, and garlic. 
  2. Pour about a third of the sauce mixture evenly into a 7- by 11-inch microwave-safe baking dish (or a large glass bowl). Stir water into remaining sauce; set aside. (I recommend using the water to get out the remainder of the sauce from the jar.)
  3. In a food processor, combine the washed spinach and basil.  Process until everything is finely chopped.  Add in the ricotta cheese and 1 egg, and process again until the cheese, egg, spinach, and basil are all fully mixed. (If you do not have a food processor, rip the spinach and basil and mix with the ricotta cheese. Add in the egg and make sure it is all mixed well.)
  4. Rinse uncooked lasagna noodles with cold water. Then arrange a third of the uncooked noodles in a single layer atop sauce in baking dish.  
  5. Spread a thin layer of the spinach/cheese mixture atop the uncooked noodles, and then add a layer of cheddar cheese and mozzarella cheese (about a third of each cheese).  
  6. Next, pour a third of the remaining sauce to make the next layer.  Add another layer of lasagna noodles on top, and repeat with another layer of spinach/ricotta cheese, followed by cheddar and mozzarella.  
  7. Finally, repeat with one more layer of sauce, lasagna, ricotta/spinach, and cheddar/mozzarella.
  8. Cover and microwave on high heat for 25 minutes, giving dish a half-turn after 12 minutes. Remove from the microwave at this point and let the lasagna stand, covered, for about 10 minutes.  
  9. Scoop out a portion, serve, and enjoy!
As I noted in the ingredients list, I did adjust a few things, leave a few things out, and adjusted measurements sometimes. This recipe is based off of spinach lasagna recipe. I couldn't help but sample a bit after it was covered for 10 minutes. Super tasty! It was cheesy and was spiced well. I'll tell ya, I absolutely hate flat tasting lasagna. I had lasagna twice in Scotland and I was disappointed both times. Just a tip... never EVER use nacho meat and nacho cheese sauce in lasagna. So nasty! Anyway, please feel free to leave a comment if you'd like to and definitely let me know about the whole Youtube video of a recipe every 2 weeks- every month. I think it could be interesting... 

As always...

 Bon appétit!