About Me

My photo
I enjoy cooking,eating food, being creative with food, and like to try new things. I try to avoid pre-packaged foods as much as I can.

Search This Blog

Dec 31, 2011

Amazing things you find when you look: PB dip

I was rummaging through some of my parents' old CDs after my cousins left and I found some music that I love! Billy Joel, Dido, Enya, and many others! I felt like I discovered gold or something, hahaha. Babysitting was alright. We played Twister, the carnival game on kinect, some bullseye ball, mario kart wii, and munched on snacks. Lunch was grilled cheese and chicken noodle soup just for the sake of simplicity and me being so tired. I just wanted the hours to fly, and they did! It was nice to connect with my cousins (because my brother and sister went to their rooms and read/played games, psh). I eventually made my brother and sister come down from their rooms and interact with their cousins. My sister was trying to protest the fact that I got paid a bit of money and she didn't. I normally give her half if she helps, but she hardly did anything except sit on her bed with her Iphone. No money for her! Otherwise it was a pretty chill day. We had such a late lunch that I didn't eat dinner until 8 pm, which is really late for us. We were supposed to make tacos, but we weren't hungry. Oh well. Guess it gives a dinner option for Friday! We're going to see the zoo lights! It should be fun! :)

So, that was pretty much yesterday summed up. Today has been alright. My brother has been bugging me to take him to get Black Ops (which I don't think is appropriate and I wonder why my parents are letting him get it in the first place), so I guess we will go do that. We'll prolly go to Walmart and perhaps Target. We'll see what happens...


Later update:

The zoo lights were skipped. The rain was being obnoxious, so we decided to skip them for the night. My brother bugged me so much to go out to the stores that (after waking up at 3 pm), we went to Walmart and the Christmas Tree shop. I didn't find what I was hoping to find at the Christmas Tree Shop, but I found some cool stuff at Walmart. I bought 2 items from the Christmas tree shop: a popsicle mold and these cute tealights that were half off. At Walmart, I found: Plants vs. Zombies for X-box, Fiddler on the roof movie, The Paigemaster movie, An American Tale movie, 3 cute cloth bins to use for my friends' gifts, some holiday pencils on sale, and two 5 lb lifting weights. I paid less than 10 dollars out of my own money for that thanks to giftcards! My brother got Black ops and my sister bought 2 books and an Itunes card. It was funny when we were buying the game because I was asked if I was 17 (beyond that, thanks) and I said yes. The lady just rang it up, not even IDing me. Wow... what if I really wasn't 17?

Anyway, so yea, that was my day. We are going to the zoo lights tomorrow because the weather is supposed to be better. Hopefully it is better! For the recipe today, I am giving you all a dip that you can use for fruit, spread on sandwiches, or just eat plain. It is easy and it's a snap to make! I hope you all enjoy!

PB yogurt dip (from The Wannabe Chef)

Ingredients:

  • 1/2 cup fruit-flavored or vanilla yogurt (I used vanilla greek yogurt)
  • 1/2 cup peanut butter
  • 1/4 cup powdered sugar
  • Fruit/veggies for dipping                                                                                                                                                                       
Instructions:

  1. Mix together all of the ingredients completely making sure there aren’t any clumps. 
  2. Move to a serving dish. Serve with fruit and vegetables.
  3. Enjoy!
Keep in mind that you might have to add a Tablespoon or two extra of yogurt to get the right consistency. I know I had to. It just depends how runny your peanut butter is! Let me know how it goes! Enjoy!

As always... 

Bon appétit!

Dec 28, 2011

Day 5 results: White chocolate PB balls

Alright, so it is a little late with posting. However, I still feel a little as if it was before Christmas. Still pretty busy, but have chances to sleep in which is fab. I have chilled with the baking though and I am grateful for that! I took today to do stuff for myself. I did my nails and then took a really long shower. I also played Just Dance 3 for a bit of exercise in my lazy day and pampered my poor, drying out skin with some lotion. I spent a bit of time reading more of The 150 Healthiest Foods on Earth: The Surprising, Unbiased Truth About What You Should Eat and Why because it is interesting and I would love to add more variety/healthful stuff to my diet. I must say, being at home really messes up my eating habits. I am going to have to think of solutions for after college life back home. Hmmm. I get to watch my cousins tomorrow, joy joy. Hopefully Friday I will be able to take my brother and sister with me out to the stores to spend some gift cards and buy some items that we would like. We are also going to the zoo lights, which should be fun! Anyway, I took some pics of our dog today with various Christmas items. She wasn't enthusiastic about it and definitely didn't cooperate as much as she could have but I did catch a few cute/funny ones. I included two in this post for you all to enjoy! :)


Cute, huh? She is a sweetie. :) Love her so much. Then again, I think most of us love our pets lots! But yea, life is going well. I decided to switch one of my classes because it was about dance instead of actual dance. I was really hoping to take another dance class. :( Guess it is one thing I will have to look into for fitness or something. So, you might be wondering... how was your Christmas? To be honest, it was decent. I got some gifts off of my wishlist and I got a few that weren't on there, but were very thoughtful. I have 2 new cookbooks to tinker with and enjoy! I also got a new laptop! :O That was a major surprise, but a welcome one, since my Dell laptop has duct tape. My sister gets my Dell and I get to take my new laptop to school. The only painful thing is transferring all the info from one computer to another. I had to do that when my hard-drive was replaced, and I hated doing it then... let alone doing it AGAIN. Rawr. Ah well... I will persevere! 


White chocolate Peanut Butter Balls 


Ingredients:

  • 2- 2.5 lbs of white chocolate coating/vanilla candy coating (it looks like this)
  • 5 cups of Rice Krispie cereal
  • 1 stick of butter or margarine 
  • 3 cups powdered sugar
  • 2 cups peanut butter
Instructions:

  1. Using a spatula, a spoon, or a fork, gently mix cereal and powdered sugar in a large bowl. 
  2. In a small, microwaveable bowl, melt the peanut butter and butter. I suggest microwaving 1 minute and then in 30 second intervals. Make sure you stir often.
  3. Dump the melted butter and peanut butter in with                          the cereal and powdered sugar. Quickly mix with a spatula and then your hands.
  4. Start forming balls of the mixture. You can make them bite size or larger if you'd like. Work quickly or the mixture dries out!
  5. After you have used all of the mixture, wash your hands.
  6. Set out a section of wax paper for your finished product to cool on.
  7. Melt the white chocolate in a different microwaveable bowl. Start with 1 minute and then go to 30 second intervals, stirring after each heating.
  8. Dip the peanut butter balls into the white chocolate. Set onto the wax paper. 
  9. Let them sit until they are dry to the touch and then store in an airtight container or eat!
  10. Enjoy!


This recipe will make 5-6 dozen if you make the PB balls bite-size, but it will make less if you make ping pong size or golf ball size PB balls. These remind me a lot of buckeyes, but with some crunchiness, which is nice. Really rich though! This is a recipe that I am going to make for many years to come! Happy Holidays! I hope that all of you who celebrate Christmas had a fabulous day!

As always...
Bon appétit!

Dec 23, 2011

Day 4: PB cookies with Hershey kisses

Day 4 accomplishments: nut filled cookies, dipped the buckeyes (PB balls) in chocolate, baked the shortbread, PB Hershey kiss cookies

My feet hurt. I spent about 8 hours in the kitchen today. CRAZY! Still have more stuff to make tomorrow. I am determined to be up before 2 pm! I hid my alarm clock, so hopefully I won't be able to zombie walk to it and turn it off (that has been my problem this whole week!). My mom has criticized my baking a few times this week and it has really gotten on my nerves. Just let me bake my way! I kind of get into this baking zone and if someone interrupts it, I get all RAWR! Yea >.>... Anyway, the recipe I have today is one that I thought I should bring back to the baking repertoire in our house. I remember having these at Christmases past and wanted to try them out. I think they came out nice! Although, my sister didn't push the hershey kisses in enough, so some are just falling off -.- grrr. The hazards of baking with people in my family, haha. Tomorrow is snowballs, PB balls, sugar cookies, and Hungarian love letter cookies. Hmm, hope I remembered all of them. I think that is it... I cannot wait to be done baking tmrw -.- I love baking, but all this "You made these too big" "I hate baking, sis" and whining has really stressed me out. I like to bake at my own pace, without people interfering, yeesh!

Peanut butter Hershey kiss cookies (from Cooks.com)

Ingredients:

2 kisses were smashed :(
  • 1 cup butter
  • 1 cup peanut butter (creamy)
  • 1 cup sugar
  • 1 cup packed brown sugar
  • 2 egg
  • 2 1/2 cups flour
  • 2 tsp. baking powder
  • 1 1/2 tsp. baking soda
  • 1/2 tsp. salt
  • 1-2 bag of Hershey kisses
Instructions:

  1. Preheat oven to 375 degrees. 
  2. Mix together first 5 ingredients.
  3. Add flour and mix until you form a sticky dough. 
  4. Roll into small balls and place onto a greased cookie sheet.
  5. Bake 8-10 minutes or until just golden brown. 
  6. Place Hershey kiss (with wrapping removed) in center of each cookie, while they are still hot.
  7. Enjoy!
Simple and delicious! I hope you enjoy these cookies as much as the rest of the family has! 

As always...
Bon appétit!


Day 2/3 of baking: Chocolate covered pretzels

Day 2 accomplishments: chocolate covered pretzels, mint chocolate chip cookies, peppermint patties, fudge
Day 3 accomplishments: shortbread dough, buckeye PB balls rolled, spritzer cookies, coconut macaroons, 7-layer bars

I have been baking anywhere from 4 -8 hours a day. Am I nuts? Maybe. I wanted to try some stuff and my mom likes to give me random cookies that she wants me to make. Blah. Been a bit crazy. Then again, holidays seem to be busy for everyone! So, since the holiday is nuts and people might not have much time, here is a simple recipe that is quick, easy, and delicious!

Chocolate covered pretzels or potato chips (from Food.com)

Ingredients:

  • 1 cup semisweet chocolate or 1 cup milk chocolate or 1 cup white chocolate chips
  • 1 tablespoon vegetable shortening
  • 16 pretzel rods, pretzel twists, whole-wheat pretzel sticks or 16 rippled potato chips

Optional Decorative Toppers-

  • semi sweet miniature chocolate chip
  • white chocolate miniature chocolate chip
  • candy sprinkles

Instructions:

  1. Put out a strip of wax paper or parchment paper.
  2. Microwave the chocolate and shortening in a microwaveable bowl (uncovered) for 1 minute. Stir. 
  3. Keep cooking in 30 second intervals (stirring each time) until the chocolate is melted. 
  4. Dip the pretzels or potato chips and then roll in decorations (if using sprinkles, just sprinkle them over the chocolate covered item) and then place on the parchment or wax paper. You can use a spatula if you'd like, or a fork to help with the dipping process. Decorate as much or as little as you'd like!
  5. When the pretzels or potato chips have chocolate dry to the touch, then they are ready to be put away.
  6. Store in an airtight container at room temperature. It is best to eat potato chips no later than a few hours after preparation. 
  7. Enjoy!

Simple and fast! I didn't do much to my pretzel rods, but I did add a drizzle of the leftover chocolate and dipped a few in sprinkles. I hope you try this out!

As always...
Bon appétit!

Dec 20, 2011

Baking extravaganza- day 1 results: Brownie Crackle Cookies

So, today was a laid back day for the most part. I woke up at 11 am, got ready, and then made my grocery list. I might have taken a wee nap after breakfast, so my schedule was a bit off... Then my mom decided that she would go with me to the grocery store. We first had to pull coupons though... That took at least an hour! Coupons are great for saving money, but boy, they are a pain in the tushy! I had to go through all of the categories and get rid of expired coupons, cut new coupons, and go through the large stack of unfiled coupons. Filing the coupons would have taken even longer, so we just left it as is. Then we were off! Since we had coupons, the grocery store trip took longer. We were also going off of random coupons, 3 different lists, and other odds and ends that my mom decided to buy. One cart was filled to the brim, and the second one was maybe about half full. We had sooooo much baking stuff and other assorted items. The one person behind us got impatient and switched to a different lane. Sorry, lady! The good news is that we saved about 50 dollars because of coupons. Any money saved is awesome, especially this time of year! After the store, it was spaghetti for dinner, a quick talk with grandma to tell her happy birthday, and then baking time! Keep in mind, this was at 8 pm... my grandma thought I was baking late. Psh. I just got home on Thursday! My list for tomorrow grew a bit since I didn't finish all that I wanted to today, but it's alright... Oh! My sister has already entered the "I hate baking so why don't you do it all and I'll just eat" whiny phase. Should be *great* to work with her on sugar cookies. -.-

After all that babble, I am sure that you are all ready to see what this recipe looks like. It is an easy recipe, but your hands will get messy. My "dough" was a little runny, but I almost think that is the way it's supposed to be, because the cookies had a great texture. Just be prepared to have some messy hands! (looking at the pictures, it seems like my dough was a bit runnier... hmmm...)

Brownie Crackle Cookies (from Recipe Shoebox)

Ingredients:


  • 1 pkg. fudge brownie mix (13x9-inch pan size) 
  • 1 cup all-purpose flour
  • egg
  • 1/2 cup water
  • 1/4 cup canola oil
  • confectioner's sugar and/or sprinkles (I just used powdered sugar)
Instructions: 

  1. Preheat the oven to 350 degrees F. 
  2. In a large bowl, stir the flour and the brownie mix together.
  3. Add the egg, water, and canola oil.
  4. Mix until well combined. (You might want to stir a little longer if it is somewhat liquid-y)
  5. Place the confectioners sugar and/or sprinkles into shallow bowl(s). 
  6. Drop dough by tablespoons or a melon scooper-ful into the confectioners sugar or sprinkles. 
  7. Roll into balls and place 2 inches apart on a greased or parchment paper lined baking sheet.
  8. Bake for 8-10 minutes or until set. 
  9. Remove from oven and let set for a few minutes before moving to a cooling rack or wax paper. 
  10. Enjoy!
So, what do you think? Sounds simple enough, huh? I sure thought so. Even though my dough wasn't perfect, the cookies still came out fine and they taste like chocolate-y brownie-licious cookies. :) I hope you try them out!


As always,
Bon appétit!

Dec 18, 2011

Just checking in...

Hello, blog readers. Yes, this is just a check in. Not that anyone was worried about exams eating me or anything? ;) :P Anyway, I somehow survived exams week and am finally at home. Trying to adjust to being home again sucks. I'll just put that out there right now. I mean, I understand that my sister is playing tomorrow, but my mom just seems to like torturing me with the 2 hour service that I might technically be present, but all I am thinking is "Please, let this end and let me escape!" I am not really a person who believes all one way or all another. I just have my own beliefs that combine multiple ideas and I don't like the idea of fitting in a box. Anyway, that's my biggest complaint so far. Also getting used to the "family scuffles" is going to take a while...

I have had major insomnia lately, which I think stemmed from the lack of sleep Sunday - Thursday because of exams. It's just another friction point because my parents don't seem to understand that when you go to bed at 6 am that noon really isn't "sleeping in late." It's just something I guess I need to adjust to. I just miss my own schedule, but I definitely do not miss the microwave and mini fridge/freezer. I am enjoying having a full kitchen and I will soon be busying myself with Christmas cookies, candies, chocolate covered pretzels, and more. Luckily for all of you, I will be sharing my recipes and the pictures of the lovely creations.

So, how has your holiday season been so far? I have found that buying gifts is a pain. However, using my free trial of Amazon prime is fantastic! Free shipping! I'll have to cancel the subscription when my month is up, but I think it was worth getting free shipping on some gifts for the family. I want to make some goodies for the neighbors, so hopefully they will enjoy them. At the end of my 3 week break, I need to finish up the gift for my friends up on campus (more baked goodies mixed with some other little items). Well, that's all from me for now. I shall leave you all with a question:

What little family quirks drive you bonkers? I'd love to hear from you in the comments section! :) Happy Holidays!

Dec 10, 2011

Post 77! Pesto-licious Sandwich

8 days since I have blogged. Ouch. Long time for me... School is winding down. This last week was crazy and I have never been so happy to be approaching exams week. Well, I only have 3 days of exams... thank goodness! I have 4 exams, 2 papers, and 1 presentation standing between me and break. Blah. It is difficult to listen to Christmas music because I already want to be home. I would have normally had exam week this past week and be home now, but the school changed our semester schedule. That change pushed back starting school and made us go a week later. Not really liking the change... It's a good thing this is my last fall semester then, huh? Oh! My parents sent me an exam care package. It's actually pretty cool looking... see?
I got a lunchbox filled with goodies. I won't eat all of it, but the thought is still pretty sweet! Since I have been so crazy busy lately, I fell a bit behind in dishes... I was so behind in dishes, in fact, that on the day I washed them... my bed looked like this...
Crazy, huh? I have vowed to never ever do that again. Those dishes took 3 trips back and forth from my room to the bathroom. Not cool. I'm currently doing laundry and hoping that I will finish writing my Christmas cards tonight. They HAVE to be in the mail on Monday otherwise they have absolutely no chance of getting there before Christmas. Many of the addresses I am sending these cards to are international, so yea. Gotta get working on that, haha.

I am looking forward to going home. We're going to set up the Christmas decorations, bake oodles of cookies, and listen to lots of Christmas music. This might seem like a childish thing to like, but I can't go a Christmas without listening to the Disney Christmas CD. Call me crazy, but my inner child squeals with glee when that CD is on. I also adore listening to our Celtic Christmas CDs. They can be so soothing during this crazy time of the year. I know that when I went to Walmart today it was a zoo. So many people are shopping for Christmas gifts and seem to be stressed and just overall crazy. I take a simpler approach to Christmas. I have started realizing that Christmas is much more than a day full of stress and presents. In fact, I tried to get a minimal number of presents from the store. I want to bake some presents and spread the joy of the season to others. I see Christmas as a time for family, fun, baking, and mugs of hot chocolate. Yes, Christmas breakfast is a nice tradition, and I cannot deny that I love opening gifts, but it is much more worthwhile to give than to receive. I love seeking out opportunities to give to others, even if I don't get something in return. Do you feel the same way about Christmas? I feel Christmas has been butchered into a holiday full of stress, greed, and nasty people. What ever happened to good cheer, helping others, giving to charity, and being polite? It makes me think that if I ever have a family, that we should retreat to some deserted place just to enjoy Christmas the way it is supposed to be celebrated.

I have discovered lately that I have someone in my life who is very greedy. I don't think she realizes that she sounds greedy, but she does. I do understand that her family has to make ends meet a lot of times, but she also has little money sense. It makes me want to shake my head. Do you have one of these friends? I just don't really know how to deal with it. She can be such a good friend sometimes, but other times she is more sour than a lemon. Sigh. If only everyone could see the beauty in twinkling lights, the smell of pine trees, and the taste of candy canes like I do. I find Christmas time and the holidays just magical. I especially  enjoy the snow, even though it is cold! It just adds to the festivities. Well, I will spare you more of my ramblings about the holidays and jump right into the recipe for today. :)

Pesto, Ham, and Cheese Sandwich (think grilled cheese with yummy extras!)

Ingredients:
I added a little bit more pesto than I had intended. Oops!

  • ham (preferably leftover cooked ham)
  • pesto (I used my arugula, spinach, and basil pesto. It was fab!)
  • mozzarella cheese 
  • 2 slices of your favorite bread
Instructions:
  1. If you would like to make this like a grilled cheese, butter the outside of the bread slices. If you are just microwaving the sandwich, don't worry about this step.
  2. Put a thin layer of pesto on the inside of your bread, on both slices.
  3. Put on the ham and mozzarella. 
  4. Put the sandwich together and put it in the pan to cook or put it on a microwaveable plate. If you are microwaving, put a paper napkin on top of the sandwich. This will draw out some moisture and keep it "crisp" like a grilled cheese would be. 
  5. If microwaving, you need to heat it in 45 second intervals, flipping each time. Make sure you put the napkin back on the top of the sandwich. Your sandwich should be ready in 1.5 minutes. If you are using the stovetop, just cook it like you would cook a grilled cheese!
  6. If you would like to add an extra blob of pesto, feel free!
  7. Cut the sandwich in half and serve. Enjoy!
This is a delicious spin on the grilled cheese. It's like ham and cheese meets grilled cheese meets Italian flair. Haha. I enjoyed it. What do you think? Does it look tasty? 


As always...
Bon appétit!

Dec 2, 2011

Decadent Cheesecake Dip

Hello readers! I didn't go to class today because I felt completely miserable. I am hoping that I will be able to sleep early tonight and maybe feel better for pep band tomorrow. I almost wonder if my cold has turned into bronchitis because of my cough. I surely hope not. I spent way too much time on Pinterest and sorting through recipes today. The funny thing is that the recipe I am going to share with you all is one that I found while perusing Pinterest! I adore that website.

This recipe is simple, but I tweaked it from the original. I don't know about the rest of you, but I cannot stand when cheesecake is deathly sweet. This original recipe had 2 problems: 1. it was wayyyyy too sweet 2. it wasn't moist enough for the sugars to mix in well. It honestly looked like a cheese ball covered in powdered sugar before I made my changes. I mean, maybe it just turned out that way because I was mixing it by hand, but still, it didn't seem very much like a dip to me at that point, I added some lemon juice and 2 spoonfuls of vanilla yogurt. It was a bit too liquidy, so I added more cream cheese and butter. Then it was just perfect. This stuff can be eaten alone or be used to dip fruit, graham crackers, teddy grahams, and anything else that you would like to test out.

Cheesecake dip  (adapted from Slice & Dice blog)
Pearl sprinkles

Ingredients:

  • 16 oz. of cream cheese, softened
  • 1 cup of unsalted butter, softened
  • 3/4 cup powdered sugar
  • 2 spoonfuls of vanilla yogurt
  • a few squeezes of lemon juice, to taste
  • 2 Tbsp. brown sugar
  • 2 tsp. vanilla extract
  • items to dip (fruit, graham crackers, etc.)
Instructions:
Without the sprinkles
  1. In a bowl, beat together the cream cheese and butter until smooth.
  2. Add the sugars, vanilla, yogurt, and the lemon juice.
  3. Stir until well mixed.
  4. Refrigerate until ready to serve.
  5. Have fun dipping fruit, graham crackers, etc. or just eating it by the spoonful!
As I said, this recipe is easy and absolutely delicious! I hope you get the chance to try it out! 

As always...


Bon appétit! 

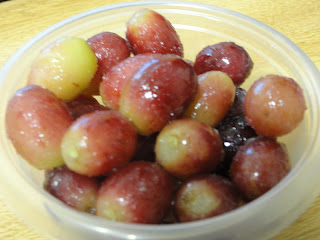
Frozen grapes: a different sort of snack

This week has been the week of insanity. I am not kidding! It doesn't help that on top of all of my crazy school assignments and group projects that I have a nasty cold as well. I'm slowly improving, but my nose is still just obnoxious. On top of this, I have had insomnia and way too many late nights the past couple days. Made this week miserable. Thankfully I don't have any homework due Friday, so I have had the opportunity to take a long nap and just relax. I know that relaxation and sleep are vital to me feeling better. This weekend will be a bit nutty with assignments and pep band, but it won't be nearly as bad as this week. To be honest, today (Thursday) was the worst day of the week. I had two group papers due and a group presentation. I am crossing my fingers that the professors grade us on our efforts and be merciful. I can always hope, right?

A funny moment happened because at 4:30 am I went to take my shower and someone was doing laundry. Oh college... I am glad that tonight has been pretty quiet because my next door neighbor seems to like having her music so loud that it bleeds through the wall and she tends to have really loud friends over really late. At 4 am I could still hear her and her crew. It's a good thing I was up anyway or I would have had to go over there and say something. But yea, I just found it funny that someone was doing laundry at that time. My cut off time for laundry is 12:30 am. Guess others don't have the same view. I hope I feel decent enough to go to lunch with my friends on Friday, but on the other hand, I don't want to spread my germs. Maybe I will just wake up late and go to class. Hmm.

As usual, since I went home, I cooked a few things so that I could bring leftover food to campus. I have been eating leftovers left and right since I have been so crazed with school work and sickness. I am just so happy that I have those leftovers right now. I am slowly going through some recipes and trying more out, so look forward to that. :) The recipe for today is something that I found on pinterest and I thought it sounded interesting. To be honest, I can't exactly explain how frozen grapes taste, because it differs from the grape-y taste you normally get. If you have sensitive teeth, this might not be the dish for you. I think these could definitely work better in the summer, but I wanted to try them out, so I did it anyway. Since the grapes are frozen yet still chewable, they could potentially give drinks an edible ice cube. Just something to think about. The process is really easy, which makes this something simple to provide variety in your snacks and put a new twist on eating grapes.

Frozen grapes (inspiration from Big Red Kitchen)


Ingredients:

  • Red Grapes (whatever amount you have should be fine) **Do not use green grapes! They freeze solid apparently!**
Equipment: 
  • small baking tray with a lip
  • plastic bag(s)
  • paper towels/towel
Instructions:
  1. Take your grapes and rinse them really well. 
  2. Pat them dry on some paper towels or a towel. 
  3. Place on the baking tray and pop into the freezer for 45 minutes.
  4. Transfer the grapes from the tray into the bags. Put back in the freezer.
  5. Serve when still cold. How frozen they are when served is up to you!
  6. Enjoy!


Some favorite add-ons, of others who have made these grapes, include powdered sugar and jello powder. I haven't personally rolled my frozen grapes in powdered sugar or jello powder, but I have eaten them with vanilla yogurt. I found the experience enjoyable. It was odd to eat a frozen grape and I still haven't quite decided whether I would make them again, but I am glad that I tried them! I hope that you will explore your adventurous side and try out these frozen grapes! However, only use red grapes! Let me know how it goes and as always...

Bon appétit! 

Nov 27, 2011

Be peppy for Peppermint Patties

Alrighty, so Thanksgiving break was a wee bit busier than expected. I slept some days and didn't sleep much other days. Weird how it works. Thanksgiving was good! I made cornbread and peppermint patties to contribute to the feast. The whole pan of cornbread was eaten and at least 3 different family members asked me what was in the peppermint patties/what the recipe was. That shows that they are awesome, right? Muahahaha, success! That shows my mom for thinking that there would be too much leftover. Psh. My aunt and uncle took the rest of the peppermint patties for an OSU vs. MI party that was happening on Saturday.

Since my grandparents leave for warmer weather in the winter, they always hand out our gifts and we open their presents at thanksgiving. My grandma got me a casserole pan, a dip chiller, a christmas glass mug, and a chefs hat, among other things. She made me put on the chefs hat (which she put my name on) and took pictures. She also told me that I shouldn't go for my masters in English and that I should have gone to culinary school. Oh well. Hehe. At least I know someone who supports my dreams. My parents on the other hand, are pushing me to find a job. Yea, graduation... and job... bleh. Probably going to be something like 2 jobs rather than 1 unfortunately.

But yes, break went by way too fast. I slept in a bit too much and then had trouble sleeping some nights, which was weird. But alas, I am back on campus for 3 weeks before going home to bake a million Christmas cookies. That's getting a bit ahead, though. Hmmm... I cooked a few things while I was at home, but some of them are repeats of what I have already blogged... just because we had the ingredients on hand. Not to worry, though! I have plenty of recipes up my sleeve and time to blog away about them... well... I at least will make time to blog. Not blogging every day has really thrown me off. It's crazy. Anyway... in this blog (that I am quickly writing before The Next Iron Chef comes on) I will divulge the peppermint patty recipe so that you all may spread the loveliness. I think I am going to whip up a batch or two for Christmas. Maybe take them around to the neighbors, along with some other baked goodies. Ya know... neighborly things.

Peppermint Patties (adapted from: Savory Sweet Life)

Ingredients:

  • 1 can of sweetened condensed milk
  • 5 and 1/2 cups powdered sugar
  • approx 3 tsp. peppermint extract (the recipe says 1 tsp, but that was not enough! Just adapt to your taste.)
  • 3 and 1/2 cups chocolate chips 
  • 3 Tbsp. shortening (I used 1 Tbsp. butter flavor and 2 of plain)
Equipment:
  • mixer with paddle attachment (or you could hand mix if you really want to)
  • spatula
  • cutting board/ baking tray
  • wax paper
  • microwaveable bowl
  • Before dipping
  • fork
Instructions:
Layering
Dipped
  1. Combine the whole can of sweetened condensed milk, 2 cups of powdered sugar, and 3 tsp. of peppermint extract in your mixer bowl. Using the paddle attachment (should look like this), mix the ingredients until combined. 
  2. Add 1/2 cup of powdered sugar at a time until you have added all the powdered sugar (you will be adding 3.5 cups or 7 of the 1/2 cups). Make sure you keep track of your powdered sugar counting! The dough should be stiff but pliable. 
  3. Roll into 3/4 inch balls. Place the balls onto a sheet of wax paper over the cutting board (wax paper on cutting board). 
  4. Smash the balls into disks. Layer the wax paper sheets if you need to in order to fit all of the disks.
  5. Pop the tray/cutting board into the freezer for no more than 30 minutes. 
  6. Temper the chocolate. Take the 3 cups of chocolate chips and put them into the microwaveable bowl. Heat in 30 second increments, stirring after each time of heating. Make sure not to overheat the chocolate! It will be melted and smooth. The stirring after each 30 seconds prevents burning.
  7. After the chocolate is melted, add the 3 Tbsp. of shortening. If you need to, put the bowl back into the microwave for 15 seconds to melt the shortening. Stir well.
  8. Grab the disks out of the freezer and grab your fork. Place a long sheet of wax paper near your bowl of melted chocolate. 
  9. Take a disk, lower it into the chocolate on top of the fork and then use the fork to shovel the chocolate over the disk and cover it. Quickly lift the patty out with the fork again. Place the patty onto the prepped wax paper sheet. 
  10. Let cool. When they are dry to the touch, they are ready to chill out in the fridge and await eating.
Even though the list of steps seems long, the process takes no more than 40 minutes. You get a lot of patties out of this. I was so done with rolling balls of minty dough that I eventually made godzilla patties. As I said before, these got rave reviews and I hope that you all get a chance to try them out! 

Enjoy! As always...

Bon appétit! 

P.S. Happy Thanksgiving! (belated of course)

Like my drawing? :P

Nov 20, 2011

Salad on Sunday

This weekend hasn't been as productive as it should have been. Oh well. It will come back to bite me later, but I really needed some time off of crazy life. We had the band banquet today and I got a pretty plaque. Something else to dust, haha. I am so looking forward to Tuesday at 4:25 pm, when I can go home! I have already thought about what I want to bring. Mainly bread and desserts to be honest. Most other stuff tends to be brought by everyone else anyway. Hmm, but yea. This weekend has been a weekend of sleep, late nights, and laziness. The next iron chef is on at 9! Woo! Gotta turn on the tv right now so that I don't miss anything lol.

Today's recipe is another salad. I love salad and the dressing served with this salad has a bit of a kick. It slightly burns my tongue, but then again I am a wimp when it comes to spicy food. I hope you all try this variation on a simple salad!

Santa Fe Salad


Ingredients:

  • lettuce of your choice
  • corn
  • black beans/kidney beans
  • tomatoes (grape or regular work just fine)
  • grated cheese
  • grilled chicken strips (you can use this marinade recipe), optional
  • Santa Fe salad dressing (this recipe or this recipe) or store bought works
Instructions:
  1. Combine the lettuce with the tomatoes, corn, and beans. You can use as much lettuce, tomato, corn, and beans as you would like.
  2. Garnish the salad with the grilled chicken strips and some grated cheese. 
  3. Lastly, drizzle on the dressing of your choice.
  4. Grab a fork and enjoy!
You don't have to use that specific marinade for the chicken, and the dressing could always be something pre-made. It's simple and delicious, yet filling as well. Hope you like it!

As always...
Bon appétit! 

Nov 19, 2011

I have returned!: Yogurt Parfait

Hello readers! (if you still are there, haha) I am sorry for my lack of posting. School has entered the hectic days. We have Thanksgiving break on Wednesday, although I think it would have been better to just have the whole week off because a lot of people miss Monday and Tuesday. Anyway, I'll go over the highlights of my week.

Band is over for the season and that marks the end of my 8 years in band. It's weird. Which means that we didn't have practice on Monday or Thursday, woo! We have the banquet on Sunday to celebrate our achievements though. My business professor decided to tell us that the Monday before Thanksgiving break (this monday) that he was going to give us a test. Really? That's evil. Tuesday was crazy because I had part of my speech due along with a few other things, and I was stressed out planning this event for Students for fair trade. Blah. Wednesday was the event, and I was disappointed at the low attendance and how uninformed and unprepared the president was. She was cooking the rice and tofurky last minute and had no idea when we'd be allowed to start setting up. She was supposed to know these details, so I had to find out. I basically set up the entire room by myself and was peeved. However, she surprised me with beautiful yellow flowers, so I was unable to stay mad. See?

But yea, that gift helped me feel appreciated and I felt less mad. Another problem was that she just kept cutting things without letting me know. I guess we had some communication issues. I am just glad that she liked the event, the decor, and the food. Thursday was crazy because of me meeting with two of my friends for lunch and having to turn in a 7 page paper on leadership. Crazy. The only nice thing was that 2 of my 3 classes were cancelled. So, I got to watch Miss Congeniality and Miss Congeniality 2! So much fun! Friday I decided to just relax and bathe in the idea of doing nothing. I watched 2 Weeks Notice and The Divine Secrets of the Ya-Ya Sisterhood and a little bit of Food Network. And today, well, I woke up late and have been trying to come up with inventive ideas for food and decide what I will bring to Thanksgiving dinner.

So, sadly, I haven't really cooked this week. I made mozzarella and tomato salad twice, ate some raw veggies, got sandwiches and salads from the union, and made some tortellini with olive oil sauce. Nothing exciting, believe me. However, I did have this fantastic chicken pesto sandwich and I will try to copy it because mmmmm so tasty. 
Anyway, today is another "wimpy recipe" that everyone should know how to do. Simple and something everyone can help out with. It has numerous variations, so let your imagination go wild! 

Yogurt Parfait

Ingredients:
  • yogurt
  • fruit
  • granola or muesli or gluten free cereal
  • honey, optional
  • whipped cream, optional
Instructions:
  1. The instructions are simple. You layer the yogurt, berries, and granola/muesli in a cup or bowl or dish. 
  2. If you'd like, top with honey or whipped cream.
  3. Yay, you can eat now! Grab a spoon and enjoy!
See? I told you it was simple. Something that might seem fancy, but it's so easy to do at home. Try it out and let me know how it goes! Cya tomorrow! 

As always...

Bon appétit! 

Nov 13, 2011

A quick post: Microwave brownie dessert

Alrighty, this is going to be a quick post. Our football team won, woo! This week has been crazy and I don't want to do homework haha, but it is necessary. My parents were here this weekend, so I had dinner with them yesterday and breakfast with them this morning. I went to bed at like, 9:30 pm on Saturday. I was absolutely exhausted. This week hasn't been a week of very much sleep, and getting up early on Saturday was not my ideal Saturday. I am still working on my list of homework, but it has diminished quite a bit. Once I finish the weekend list, I might start on the Monday list. We shall see though. I will soon be running to the grocery store to stock up on some fresh fruit and vegetables, along with some items for the event that I am planning. Planning this event in such a small span of time wasn't the best idea, but it is what it is. I have a mountain of dishes to do today that I am not looking forward to doing. I really need to start washing dishes as I use them... Hmm, that's pretty much everything in a nutshell.

So, today's recipe was a bit of an experiment. I had an immense chocolate craving and I had a box of brownies. I knew that people had made cake in the microwave before, so I figured brownies could work too. Well, they sorta did. After heating, it seemed more like a brownie dip rather than brownies. However, once they cooled for a bit, there was the consistency of fudgy brownies. Mmmm. Tasty. Anyway, here is the key to yummy microwave brownie-ness.

Microwave Brownie Yumminess
Do you see the smile?


Ingredients:
  • 1 box of brownie mix
  • whatever the box of brownies calls for (normally 2 eggs, 1/2 cup of veg oil, and 1/4 cup of water or so... it could vary, but those are the ingredients)
  • whipped cream or cool whip for topping (optional)
  • chocolate chips for topping (optional)
  • any other toppings (optional)
Equipment:
  • 1 microwaveable bowl, preferably a microwaveable mixing bowl or microwaveable baking dish
  • spatula
  • whisk
See it now? :)
Instructions:
  1. Prepare the brownie mix according to the box directions. Make sure you whisk well so that lumps are to a minimum. 
  2. If transferring the mix to another bowl or dish, make sure you lightly oil or butter the sides of the other dish. Use the spatula to get all the mix out of the first bowl. If you are keeping it in the same bowl, it will be fine as is.
  3. Heat the brownie mix for about 2 minutes on High. Stir. Keep heating in 1 minute intervals, until the bottom is still a bit mixy and the top is slightly cakey. 
  4. When it is done, the mix will absorb into the cooked portion when stirred well. If you want cake-like brownies, heat a bit longer. 
  5. Spoon out, add any toppings you'd like, and enjoy!


This was so yummy! I am glad that it worked. I enjoyed my brownie goodness with some cool whip and chocolate chips, and a nice cup of milk. Mmmm. The leftovers from this didn't last long, haha. Well, if you have a craving and don't feel like using the oven, this is simple and quick! Enjoy!

As always...


Bon appétit! 

Nov 8, 2011

Quick and Easy Taco Roni

Today was a busy day. It seems that the time change has tired out pretty much the whole campus. My morning professor commented on how dead we all seemed and my night class professor said the whole class looked really tired. Two different classes and both where the professors notice us being exhausted. Yep, it's definitely college. After my first class, the internet kept cutting out and was absolutely obnoxious. I fought it and tried to connect, but it refused. I was angry that I had to go to the computer lab to submit my homework. Frustrating. It is working for now.

My 4 classes of the day went alright overall. I am in a group for a project with a girl that I am not really fond of. Ah well, life throws us curve balls. My planning for the event for fair trade is coming along well. I am crossing my fingers that everything comes in on time, or I will be in trouble. I haven't had a lot of homework, persay, just a lot of reading and projects. It's evident that the end of the semester is creeping closer, and some professors are freaking out. My Thanksgiving break is looking ok so far, but there is the potential for homework over break still. Doesn't make it much of a break if I have oodles of work to do, huh? Alas, the woes of a college student.

So, I have a quick, cheap, and tasty recipe today. It has 4 types of canned goods, 1 spice, and a few extra yummies. If you are short on time and need a go to recipe, I highly recommend this!

Taco Roni (adapted from Mommy Hates Cooking)

Ingredients:

  • 2- 15oz cans of Chef Boyardee Beefaroni
  • 1- 14.5 oz can of diced tomatoes (you can drain if the liquid is watery, but since the liquid was thicker in my tomatoes, I added it!)
  • 1- 15 oz can of black beans, drained and rinsed
  • 1- 15 oz (or so) can of corn
  • 1/2 tsp. ground cumin (you can add another 1/2 tsp. if you'd like... I just thought it was a bit too strong)
  • 1/2 tsp. chili powder
  • 1 lb of cooked ground beef (optional) **I used chicken chunks and it tasted yummy!**
  • broken up tortilla chips, to sprinkle on top
  • shredded cheese, to sprinkle on top
Instructions:
  1. Place Beefaroni, tomatoes, beans, corn, cumin, and ground beef (if you are using it) in large saucepan; stir to combine. Bring to a boil over medium-high heat.*
  2. Reduce heat, cover and simmer 15 minutes. Sprinkle with cheese and broken chips just before serving.
  3. Serve and enjoy!
*You can also make this in the microwave. Combine all the ingredients in a microwaveable dish and heat until heated through. Mine took about 4 minutes on high, but it depends on your microwave and what dish you use. Make sure to serve out the portions before adding the chips and cheese!

I hope that this looks yummy to you! It's really easy and includes ingredients that many people keep in their pantry! 

UPDATE: I tried it with ground beef and I thought it was ok. My personal preference is the chicken. 

Let me know if you try it out! As always...

Bon appétit! 

Nov 7, 2011

Making Veggies Yummy: Panzanella

Today was interesting. I almost was late to history class because I got up literally 8 minutes before I had to leave for class. I had an *insert sarcasm here* "oh so delicious" breakfast. Class seemed to take forevvveeerrrrr. Since it was around lunch time, I popped over to the union to pick up a half gallon of milk and a wrap. Then I retreated to my room and did a little bit of work before I had to go to the sustainability speaker. I was there 45 minutes early, so I had time to read my event planning chapter and read a bit of my book for history. Overall, time well spent. I have to say, the speaker was awesome! He ignited more passion for innovation and sustainability and he got me thinking about possibilities. I really do want to make my dreams come true!

Alas, the recipe I have for you today really brings a lot of veggies to the table. I downsized the recipe to suit my needs and tastes, but you could totally follow the recipe as is, because it seems like a fab recipe (besides the raw onions for me... not a raw onions fan!).

Panzanella (adapted from Eclectic recipes)

Ingredients:

  • 2 tomatoes, diced
  • 1 cucumber, peeled and diced
  • Day old bread, diced or you could use ripped Pita bread like I did
  • dried basil, to taste
  • dried onion, to taste
  • 4 Tbsp. Olive Oil, or more if you'd like
  • 3 tsp. Balsamic Vinegar
  • salt and pepper, to taste
Instructions:
  1. Put the tomatoes, cucumber, olive oil, and balsamic vinegar in a bowl.
  2. Toss like a salad and then add the basil, onion, salt, and pepper. (I also added a few pinches of garlic salt.)
  3. Enjoy!

Really easy and really fast yet super tasty! I hope you all get a chance to try and if you are serving a few people, definitely go with the bigger recipe! Delicious and nutritious! As always...

**NOTE: To make this gluten free, use day old gluten free bread instead.**
Bon appétit! 

Nov 6, 2011

Simple dish Sunday: Egg fried rice roll up

I think today I can declare myself 100% better. I haven't felt awful all day, which is good. I think that is partly because of how much rest I had this weekend. It was great to have that time to rest. I am just glad that I feel better and feel like myself again. Today I woke up late, again, and have been watching an old episode of the Next Iron Chef. It's awesome! I also actually cooked something today, which made me happy. I think writing this blog and cooking/baking really bring some focus into my life and some peace. It's something that lets me share my passion, while not going too far out on the limb. I know that I will be tested later on my path, but I also know that this is building the foundation that is fundamental to my success and my dreams.

I want to take just a brief moment and thank all of my readers. You all really can't grasp how exciting it is for me when I see that I have another person subscribed to my blog. It makes me smile and brightens my day. Perhaps that is a bit crazy, but I hope that I will continue to gather readers with the same passion and perhaps gain feedback for these delicious recipes and food ideas. Once again, thank you. I love you all!

However, the purpose of this blog is for showcasing food and recipes, so let's move on, shall we? The recipe for today is something that takes pantry staples and mixes them all together. This dish is open to bolder flavors, different veggies, and different ways of preparation. I, unfortunately, had to use the microwave. The nice thing about the microwave cooking method is that my food was ready to go in under 10 minutes, especially since I started thinking about this dish last night.

Egg Fried Rice in a tortilla (recipe adapted from BBC Good Food)

Ingredients:

  • 1 tortilla
  • 1 egg or an equal amount of egg substitute/liquid eggs (I used a bit too much, oops)
  • A handful or two of frozen, canned, or fresh vegetables, assorted and without sauce (I had carrots, corn, peas, and green beans)
  • 1 - 2 Tbsp. butter or margarine
  • About 1 Tbsp. of Soy sauce (I used less because I dislike soy sauce)
  • Salt and pepper, to taste
  • 1/2 an onion, diced  or 2 spring onions, diced (optional)
  • 1 cup of cooked rice (I used brown rice)
Instructions:

  1. Melt the butter in your pan or microwaveable bowl. 
  2. Add the eggs and the vegetables. Cook or microwave until the eggs are scrambled and cooked well.
  3. Add the soy sauce, onion, and rice in another pan or bowl. Microwave or cook until the onion is soft. If using spring onions, only saute or microwave for about a minute or so, otherwise they won't taste as great.
  4. Add the rice mix to the egg mix. 
  5. Add extra soy sauce if you'd like and add salt and pepper to taste.
  6. If you are going to put this in a tortilla, put the mixture on the tortilla and roll it up.
  7. Enjoy!
Since I used brown rice, I let the rice soak overnight because I don't have a stovetop, and the rice had to cook for 40-45 minutes on top of the stove anyway. Soaking the rice overnight reduced my cooking time in the microwave to about 15 minutes or so. It could vary depending on the rice you use, and what you do beforehand. I only soaked the brown rice because it takes a while for the water to penetrate the rice. 

As usual, I hope you all get a chance to try this. Maybe this will spice up the normal repertoire of dinners. I had leftovers, but this could be perfect for two people, or perhaps just one really big portion. Best of luck! As always...

Bon appétit! 


Nov 5, 2011

Something simple for Saturday: PB and Banana Pita

Today really hasn't been very eventful. I went to bed at 9:30 am and then woke up at 6 pm. Bad sleeping schedule, huh? Yea, well... The good thing is that I am not feeling sick anymore, woo! I have been doing laundry for over 2 hours now. So much laundry. @.@ Guess that is what happens when you have a bunch of clothes to wash and all your bedding. The nice thing is that my laundry always smells soooooo good. Between watching Beauty and the Beast and Aladdin, I have been doing my dishes in small batches. So, my two main things for this weekend will be done tonight! I also have homework to do, but I can get done what I need to do on Sunday. It was nice to just have my Friday to do nothing and to have a Saturday of sleeping in before getting things done.

However, since I didn't have clean dishes, I barely cooked today. So, I have a suggestion for something filling and a fantastic breakfast. It isn't exactly a "recipe" persay, but it is something nummy!

Peanut Butter and Banana Pita


Ingedients:

  • A few Tbsp. of Peanut Butter
  • 1 pita pocket, preferably whole grain
  • 1 banana, cut into slices
Instructions:
  1. Spread the peanut butter on top of the pita pocket, and then add the slices of banana.
  2. Enjoy!
It's as easy as that! As I said, not exactly a "recipe" but still delicious and filling! I like this sandwich as a quick and easy breakfast and even for lunch or dinner. Mmmm. I hope you all get a chance to try!


As always...

Bon appétit! 
Nov 4, 2011

"Clotted Cream"

Eh, today has been weird. I got up a little earlier than usual to shower and study for my history test. I wasn't feeling sick at all, unlike last night. Ugh, last night I felt absolutely rotten. I took my history test and I think I remembered everything... guess we shall see. I forgot my jacket on my rush to class, so I was partly frozen when I got back to my room. I was planning on just sleeping the rest of the day, but I wasn't tired. Made a decision to watch an episode of Doctor Who, organize my lists on pinterest, and check Facebook. My late lunch/early dinner had tomatoes and cucumber with torn pita pocket strips. I'll be posting the recipe for that later. I recently took a short nap, but I am feeling sick again. Ughhhh, why? My stomach just seems to hate me. ._.

Since I promised to post the "clotted cream" recipe today, that's what I am going to post. It is fairly easy and not exactly clotted cream, but it makes an easy substitute in my opinion. Is it the same taste as clotted cream? Eh, not exactly, but it works for me.

"Clotted Cream" (found on Epicurious)

Ingredients:

  • 8 oz. Mascarpone cheese
  • 1 cup (240 ml) heavy whipping cream
  • 2 tsp. vanilla extract
  • 1 or 2 Tbsp. white sugar
Instructions:
  1. Beat all the ingredients together until mixture holds its shape and looks like softly whipped cream. If you don't have a mixer, use beaters, because otherwise your arms will ache. It takes a while to whip it to the consistency.
Yield: Approx, 1 - 2 cups 

As I said, this isn't real clotted cream, but it does taste good. It isn't super fluffy or really dense, somewhere inbetween on texture. I hope you all try out this recipe and definitely comment on how it goes. I hope you all feel well and have a spectacular day!

As always...

Bon appétit!