About Me

My photo
I enjoy cooking,eating food, being creative with food, and like to try new things. I try to avoid pre-packaged foods as much as I can.

Search This Blog

Apr 16, 2013

Chicken Kabobs


As I sit here writing this entry, the thunder is rumbling and I am seriously wishing I had a desk in my room. Oh well... something to think about whenever I move out. I really should be e-mailing a few people, but I am putting it off for just a bit... Don't worry, it will get done. Just, you know, in a bit... The sun was out for a while and it was completely gorgeous! I was hoping we could grill the steaks and marinated turkey breast for dinner tonight, but the rain ruined those plans. Guess it will be more leftovers. Woo. 

In other news, Earth Day is April 22nd! I found an adorable cupcake idea on Pinterest and it looks like this. I think I might try these out! They look easy enough. Now I just wonder if we have a heart cookie cutter or if I will have to improvise. Hmm. Any excuse to make cupcakes is a good one in my opinion. 

I also wanted to give a shout out to another fun blogger who has made me giggle numerous times recently: Pintester. I will warn that she can be a bit raunchy, but it is a great way to find out if something works or not. I have gone through my pinterest boards and deleted some of the items that she said were a fail. Others have probably been lost in the ocean wave of my numerous pins. Oops. Check out her blog and have a giggle or two!

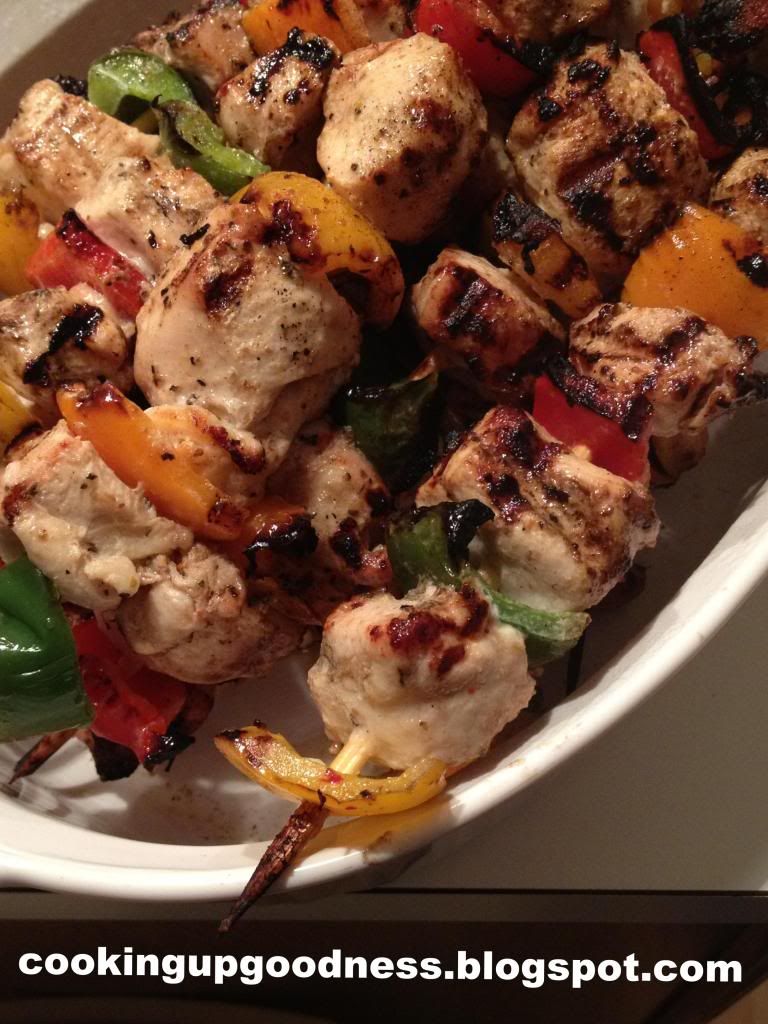
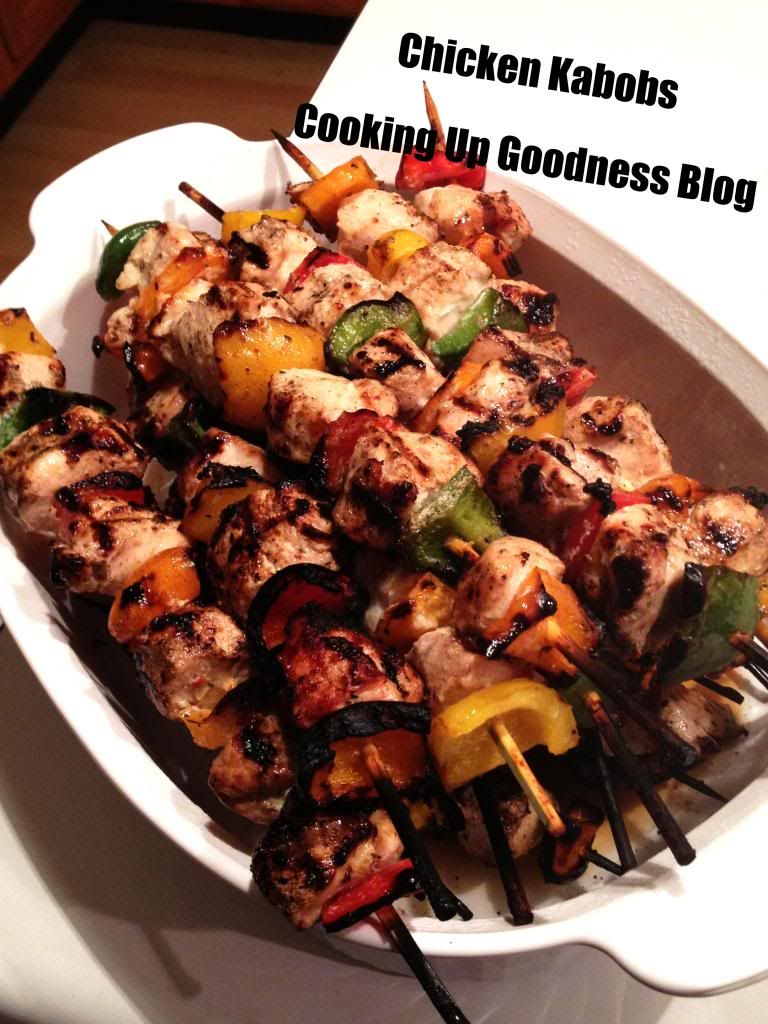
The recipe for today is one that would have worked if the weather had cooperated. However, you could prepare this recipe inside on a griddle pan if you had to. This recipe is simple stuff, people. Simple simple simple. My mom gets to take the credit for this recipe because she sort of invented it. Maybe someone else thought of the idea first, but I didn't use a recipe, so mom gets the credit for this dish. 

Chicken Kabobs 
Equipment needed:
  • Skewers- They can be reusable ones, wooden ones, long ones, fat ones, skinny ones, or any skewers you have. The only requirement would be that they don't break in half when you put chicken and peppers on them.
  • A container with an air-tight secure lid that can be used for marinating the kabobs. You will be flipping this container over! 

Ingredients:
  • 2 - 4 lbs. of chicken (depends how many you are feeding and how many skewers you have), cut into chunks roughly the same size
  • 1 bottle of dressing per 2 lbs. of chicken (We used Italian dressing.) 
  • Colored bell peppers (orange, green, red, or yellow), cut into skewer-able chunks (We used one of each kind and used approximately 4 lbs. of chicken.)
  • Onions, cut into chunks (optional)
Instructions:
  1. This might sound strange... but if you are using skewers that can catch on fire (i.e. wood) then you need to soak them in some warm water for at least 20 minutes. This will prevent them from catching on fire and hopefully prevent your hands from having burnt skewer particles on them.
  2. Open your dressing and take the lid off of your container. Believe me, you will thank me later when you have chicken hands!
  3. Start your skewers. I varied mine with 1 piece chicken then one pepper piece and so on so forth. If you are including onions, you could have one chicken, one pepper, one onion, but you can be as creative or as crazy as you want with as many peppers and onions as you wish. 
  4. Plop the prepared skewer into your container.
  5. Repeat steps 3 and 4 until your chicken, skewers, peppers, and onions are used up.
  6. Wash your hands well. 
  7. Dump the bottle(s) of dressing over your kabobs.
  8. Place them in the fridge and let them marinate for at least 2 hours, flipping the container after one hour. These can marinate for longer, if you have the time.
  9. Fire up the grill!
  10. Grill the chicken until it is no longer pink on the inside. If you didn't cook them all the way through on the grill (Like I have done before), don't panic! You can pop them in the microwave for a few minutes to finish them off.
  11. Eat and enjoy!
Time: Prep- 30 minutes, Marinating- 2 hours or more, Cooking- 20 - 30 minutes (?)

The great thing about this recipe is the fact that you can vary it to work with the dressing flavor. For example: if you wanted to use an Asian dressing you could use pieces of carrot, onion, peppers, and other flavors that would blend well. You can use homemade dressing, completely ignore the chicken and make grilled veggie kabobs, or you could choose other vegetables that you would like to grill. The possibilities are almost endless!

Love it? Hate it? Want to make it? Let me know what you think with a comment below!
As always...

Bon appétit!

P.S.  If you love it, or have made it, or have any suggestions then feel free to leave me a comment! I love hearing input from my readers and would LOVE to hear from YOU! :)


Apr 8, 2013

Crescent-Wrapped Baked Brie

Life has been the usual ordeal: cleaning, Relay For Life stuff, Youtube being a pain, cooking, baking, etc. Nothing too out of the ordinary. I don't really understand why Youtube keeps starting and stopping, but I am dealing with it. Oh! I have refrained from adding text to my photos before because I thought it was pointless, but now that Pinterest is big, the link to something can easily be lost. Basically, I am adding my blog link to my photos and the name of the recipe to one photo out of the bunch. If it bothers you, I apologize in advance, but Pinterest made me do it. Not really... it's just a precaution for the people on Pinterest who wonder what something is when someone switched the links out for a spam site. Anyway...

Crescent-Wrapped Baked Brie. In one word: nom. A delicious crescent roll outside and the ooey gooey cheesy center, mmmm. This is what I call delicious. I had never ever tried brie before this recipe and I decided that it was worth a little bit of money to purchase it. I did not use the 8 oz round as suggested (because the 7 oz wedge was on sale!) and I still had great success. If you love melty cheese and delicious crescent rolls, then this one is for you!

Crescent-Wrapped Baked Brie (from Pillsbury.com) 

Ingredients:
  • 1 can (8 oz) of Pillsbury crescent dinner rolls OR 1 can (8 oz) of Pillsbury crescent Recipe Creations refrigerated seamless dough sheet (or any 8 oz tube/can/roll of crescent roll dough)
  • 8 oz. of Brie cheese (approximately), with the rind removed (rind is optional)
  • 1 egg, beaten
Instructions:
  1. Preheat your oven to 350 degrees F (180 C).
  2. Prep your cookie sheet with parchment paper, a Silpat mat, or use a nonstick cookie sheet.
  3. If not using the seamless crescent roll dough: unroll the dough, divide in half, and pinch the seams together with your fingers. You will have two squares of dough. If you use the seamless crescent roll dough: unroll the dough and then cut it in half to form two squares. 
  4. Place the Brie on top of and in the middle of one square and cover with the other dough square. Fold the bottom edges over the top edges. Trim extra dough if needed.
  5. Brush the dough with the beaten egg.
  6. Bake for 20 - 24 minutes, or until golden brown.
  7. Cool for 15 minutes.
  8. Serve warm and enjoy!
There are plenty of savory and sweet add ins that could be added to vary the flavor of this dish. I hope you like it! 

Enjoy!

Love it? Hate it? Want to make it? Let me know what you think with a comment below!
As always...

Bon appétit!

Mar 25, 2013

Lasagna, revisited

This week has involved plenty of planning. Planning kids activities for Relay and making lists of what is needed. Also planning who I need to e-mail and making a list of what I have left to do. I have also spent some time watching CSI Miami when the re-runs are on. I absolutely loved that they brought big agriculture into the picture in the episode "Bad Seed". I liked how they poked at the problem in the US without saying the company's name. I encourage everyone to watch that episode (or even the show!) to learn a bit more about how much control certain companies have.

After cooking so much this week, we have plenty of leftovers. It is always nice to have a break from cooking. This recipe is delicious!

So, a few days ago I wanted to make lasagna. I pulled out my handy recipe that I posted before: Veggie Lasagna and Lasagna. This time, I combined the two together and used two 9 x 13 pans for my doubled recipe of goodness. It had plenty of veggies and plenty of deliciousness! This recipe is a tweaked version of The Neely's Mama's Lasagna. If you wanted to, you could make their recipe as is (minus one of the salts, since they include 2 different types), but I enjoy my lasagna version. It's a great way to sneak vegetables into something that my brother will eat! It is cheesy, gooey, and oh sooooo delicious!

Full O' Veggies Lasagna

Ingredients:
  • 1 tsp. Olive oil, plus extra for the pan
  • 2 - 2.5  lbs of ground beef or turkey or mixed (depends how meaty you like it)
  • 2 large onions, chopped
  • 8 - 9 cloves garlic, minced
  • 2 (14.5 oz) cans of stewed tomatoes, diced OR 2 (14.5 oz) cans of diced tomatoes
  • 2 (8 oz.) cans of tomato sauce
  • 2 (6 oz) cans of tomato paste
  • 1 (8 oz) container of portabella mushrooms, chopped
  • 1 celery heart, finely diced
  • 1 lb shredded carrots (you can put these in the food processor)
  • 4 eggs
  • 4 cups cottage cheese
  • 1 cup grated Parmesan (do NOT use the stuff from the green canister!), plus extra for on top
  • 6 tsp. freshly chopped parsley leaves OR 6 tsp. freeze dried parsley
  • 3/4 tsp. salt
  • 2 tsp. pepper
  • 1 - 2 tsp. dried basil, optional
  • 1 & 1/2 cups of chopped spinach
  • 2 (8 oz) bags of shredded Mozzarella
  • 2 (8 oz) bags of shredded Cheddar
  • 2 (8 oz) boxes of no-boil lasagna noodles
Special Equipment:
  • 2 (9 x 13) baking dishes/pans
  • Pasta pot or other large pot
  • 1 large bowl
  • Whisk
  • Aluminum foil
It gets messy when you serve it.
Instructions:
  1. Prep all of your veggies. Dice them, shred them, and chop them according to the ingredients list. (I suggest prepping the veggies the night before.)
  2. Pre-heat your oven to 375 degrees F (190 C).
  3. Add the teaspoon of olive oil to a pot and then brown your meat. (This pot will have your sauce mixture in it. I used a pasta pot.) 
  4. Once the meat is cooked, drain the grease. 
  5. Add your shredded carrots and celery to the browned meat. Saute for 5 minutes.
  6. Add your mushrooms, garlic, and onion to the meat mixture. Saute for 3 minutes.
  7. Add in the cans of diced stewed tomatoes or diced tomatoes, tomato sauce, and tomato paste. 
  8. Simmer the sauce for 15 minutes, stirring occasionally. 
  9. In a large bowl, lightly whisk the eggs until the yolks are broken. Add in the cottage cheese, Parmesan, parsley, basil, salt, pepper, and spinach. Mix until well incorporated.
  10. Lightly oil your pan with olive oil or use a little cooking spray. (I forgot this step and the lasagna didn't have too much trouble leaving the pan.)
  11. Spread a little of the meat sauce at the bottom of a 9 x 13 baking dish or pan. You need maybe one or two scoops. Place a layer of noodles over the sauce, making sure they overlap by 1/2 inch or so.
  12. Spread 1/4 of the cottage cheese mixture evenly over the noodles. Pour 1/2 an 8 oz bag of cheddar and 1/2 an 8 oz bag of mozzarella over that and spread out as even as possible.
  13. Put another layer of noodles on top of the cheese. Add another layer of sauce, then noodles, then cheese mixture with shredded cheese, and end with noodles and sauce.
  14. Sprinkle leftover cheese and Parmesan on top. 
  15. Cover the lasagna with aluminum foil and bake for 30 - 35 minutes in the center of the oven until the sauce is bubbling around the edges.
  16. Remove the aluminum foil and let cool for 10 minutes.
  17. Enjoy!
Makes: 2 (9x13) pans of lasagna

I know this dish seems crazy, but it is manageable. You could even have one person make the sauce and one make the cottage cheese mixture. This recipe doesn't take any more than an hour if you prep the veggies the day before. I absolutely LOVE this lasagna. It is my go-to lasagna recipe now and my mom even wants the recipe when I move out! This is a great dish for leftovers. You can even freeze the assembled (uncooked) lasagna until you want to make it.

We enjoyed this with garlic bread and a lovely salad. It was delicious dinner and a great reward for the time it took to cook and prep. 

Enjoy!

Love it? Hate it? Want to make it? Let me know what you think with a comment below!
As always...

Bon appétit!


Mar 11, 2013

Sugared Rice with Fruit and Nuts

Lately I've felt like I am living in limbo. The odd in-between stage. You still feel like you play a part, yet you don't completely fit in as well anymore. You know? It's a strange feeling...

The bonus of being in limbo is more time to test recipes and more time to bake and cook. I still find it fun to play with recipes and make them my own. Then again, any foodie would probably tell you that. I've recently finished reading an interesting book about the foods we eat, allergies, GMO's, and our food system. The book is called The Unhealthy Truth: How Our Food Is Making us Sick and What we Can do About it by Robyn O'Brien with Rachel Kranz . I borrowed this book from the library and I'll be honest... I had to put the book down a few times. It was a good read, but it sure made me sad and unhappy and mad all at the same time! If you ever wondered about the US food system or about corporate control with food then you should start with this book. It is slightly out-dated now, but all of the research is excellent. There is a long list of cited sources! If you get a chance to read it, let me know what you think!

Alas, food. It is why I started this blog in the first place! =D

The recipe for today is one that I created. It stirred up memories of when my mom used to put a little bit of butter and sugar on my rice as a special treat. We had leftover brown rice and I kept thinking about how I could transform the rice into something delicious. Well my friends, this is a rice transformation if I do say so myself! I transformed a side dish into a yummy (and somewhat healthy) dessert. Enjoy!

Sugared Rice with Fruit and Nuts

Ingredients:

  • 1-2 TBSP of butter, melted
  • 1 cup of leftover cooked rice, more or less
  • 1-2 TBSP of brown sugar, or to taste
  • handful of cut up fruit (I used blueberries)
  • handful of chopped nuts (I used walnuts)
  • handful of dried fruit (I used raisins)
  • other toppings, optional
Instructions:

  1. Heat up your rice until it is warmed through.
  2. Add the butter, sugar, nuts, and fruit to the rice. If you have any other toppings, you should add them in this step as well.
  3. Mix well and then eat.
  4. Enjoy! 
This dish is easy, doesn't require many ingredients, and can be customized to your tastes. I hope you try it out! 

Love it? Hate it? Want to make it? Let me know what you think with a comment below!
As always...

Bon appétit!