About Me

My photo
I enjoy cooking,eating food, being creative with food, and like to try new things. I try to avoid pre-packaged foods as much as I can.

Search This Blog

Jan 31, 2012

Shortbread on Tuesday

Hello readers! It is amazing how fast time flies, at least sometimes. This week has made me realize that possibilities are something worth taking a chance for. I was made the president of a group on campus and so far it is utter chaos. The information isn't all in one place, which frustrates me the most. I like organized data, lists, and important info. Without that, I feel frazzled. I also found out another thing about myself... I can be too quiet for people's taste sometimes. I try to think of what to say and then it will sound different than I intended and ugh.... it makes a mess. I just wish I could come with a manual to pass out to anyone who knows me. That would prevent some problems from happening. It would be kinda funny though... don't you think? Someone passing out instruction manuals. Not like people always read those anyway... A third thing I have learned about myself this week... I really don't see any potential in what I look like. I feel like something will always need fixing. I need to fix that attitude of mine and fast. Otherwise I have a feeling I am going to be one miserable cat lady.

Anyway, self discovery aside... the events since last blog aren't too thrilling. However, I somehow lost my phone in the classroom. I don't understand how I really did it, because we searched the entire room and didn't find it, but my phone pulled a magic act and is gone. Kinda sucks. So, I am looking into new phones. Been a bit of an adventure. That mixed with classes has kept my mind busy. UPDATE: My phone was found! Joy joy joy! :)

Refrigerator Shortbread Cookies (from Tastebook)

Ingredients:

  • 1 cup (2 sticks) of unsalted butter, room temperature 
  • 1 cup powdered sugar
  • 1 tsp. vanilla extract
  • 1/4 tsp. salt
  • 2 cups all-purpose flour (plain flour), plus more for rolling out the dough
Mix in possibilities:
  • 1/3 cup dried cherries or other dried fruit 
  • grated zest of 2 lemons/limes 
  • 1/2 cup finely chopped walnuts, pecans, or peanuts
  • 1/2 cup mini-butterscotch or other flavored chips
Instructions:
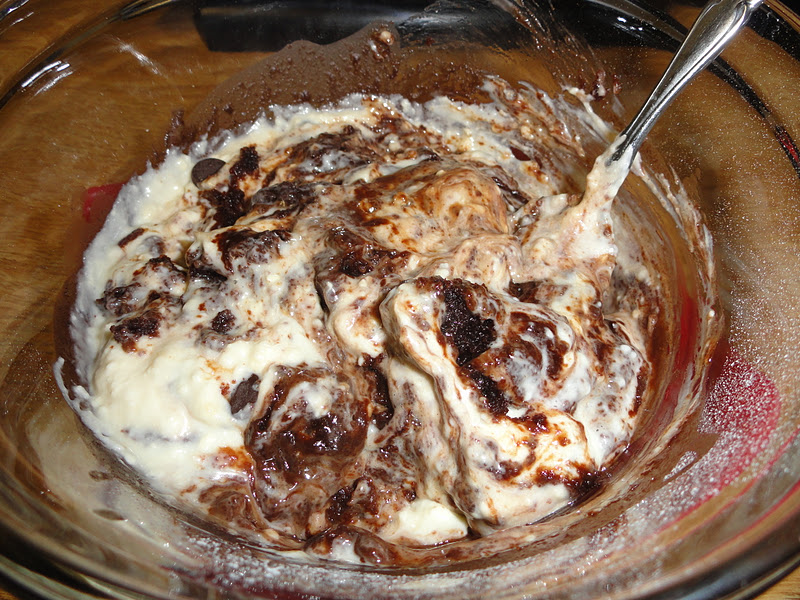
  1. Beat butter, sugar, and vanilla until smooth and fluffy. If working with an electric mixer, start on low and                         then go up to medium speed.
  2. Reduce the electric mixer to low and slowly add the flour. 
  3. Mix until a dough forms. Stir in any mix ins.
  4. Lightly flour a flat surface. Take your dough and roll it into a log about 1 1/2 to 2 inches wide. 
  5. Wrap the log tightly in plastic wrap. Refrigerate until firm (about 1 hour) or place in the freezer. You can refrigerate this for up to 4 days or freeze up to 3 months.
  6. When ready to bake, preheat the oven to 350 F (180 C).
  7. Unwrap the log and slice into 1/4 inch slices. If the log is frozen, make sure to let it sit at room temperature for 15 minutes before slicing)
  8. Lightly grease your cookie sheet or cover with parchment paper. 
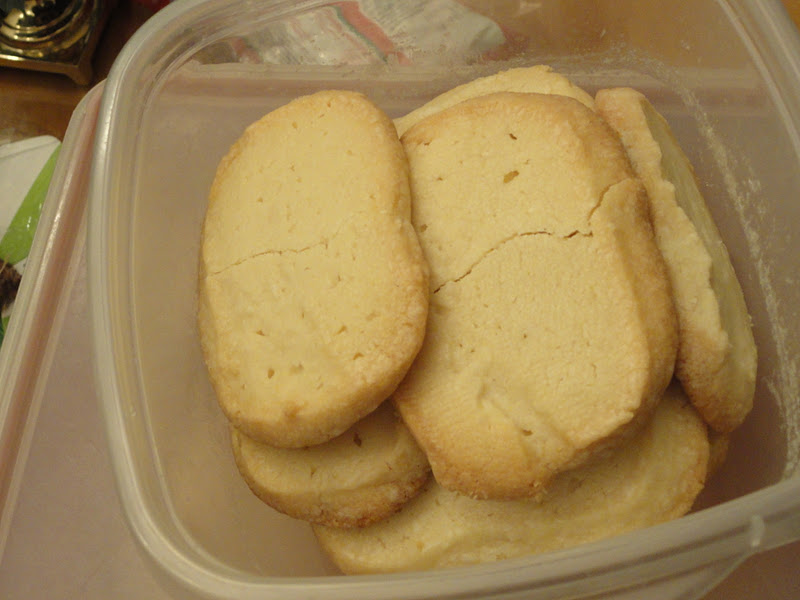
  9. Place slices 1 inch apart on a cookie sheet and bake for 13-15 minutes or until edges are golden. 
  10. Cool cookies and then enjoy, or store in an air tight container. 
This recipe may seem long, but it isn't difficult. The first half is all about preparing the dough to chill, while the rest is for baking. I personally enjoyed being able to make a dough and have it ready for the next day. It was especially awesome during the chaos of Christmas baking. I hope you all enjoy!

Love it? Hate it? Want to make it? Let me know what you think with a comment below!

As always...
Bon appétit!

Jan 22, 2012

Minty Sunday

Wednesday, Thursday, and Friday weren't very exciting. Classes, sleeping, eating, and homework basically. Yesterday I attended a student run concert that focused on movie music. It was pretty cool! I also went to pep band and got free pizza, woot! As usual, I completely threw off my sleep schedule this weekend. It should be interesting going back to my normal sleep schedule for Monday. I am slowly going through all of the fresh produce that I bought last weekend. I have worked out twice this week (in my room, with hand weights) which is big for me. I plan to continue doing the workout thing so that I can eat my yummy food and still lose weight. I will have some recipes of what I have been eating lately once I finish these cookie recipes from Christmas. :S

I didn't wake up until 3 pm today, so I haven't eaten much. I need to be making my "dinner" soon. I think I am going to mix black beans, corn, tomato, salsa, cheese, and guacamole. I'll probably eat the concoction with tortilla chips. Seems interesting to me, haha. Today has been a lazy day, but I did do dishes! I really need to accept the fact that dishes are never ending. As soon as I wash one batch another batch starts piling up. *grumble* I have also spent a couple of hours organizing my 500+ favorited videos on youtube. I never imagined it would take this long! O.O When I took a study break, I watched Robin Hood. I still have homework to do, but eh...

The recipe for today is minty and has chocolate chips as well. My cousins loved these cookies! Our family isn't fond of mint stuff, so they were happy to see the mint stuff vanish. We still have oodles of cookies in our freezer though!

Mint Chocolate Chip Cookies (adapted from Food.com)

Ingredients:


    • 1 1/3 cups sugar
    • 3/4 cup margarine or 3/4 cup butter, room temperature
    • 1/4 tsp. mint extract or 1 Tbsp. finely chopped fresh mint leaves
    • 1 egg
    • 2 cups all-purpose flour
    • 1 tsp. baking soda
    • 1/2 tsp. salt
    • 10- 12 oz. chocolate chips
    • green food coloring
    Instructions:

    1. Preheat the oven to 350 F or 180 C.
    2. Mix the sugar. margarine, mint, and egg in a large bowl.
    3. Mix in the flour. baking soda, and salt.
    4. Add in the green food coloring if you are using it. Start with a few drops and then add more if needed. 
    5. Carefully stir in the chocolate chips.
    6. Prep your cookie sheets with parchment paper or spray nonstick cooking spray on them.
    7. Drop dough by heaping spoonfuls about 2 inches apart on the cookie sheets.
    8. Bake 11-13 minutes or until the tops are lightly browned. 
    9. Cool and then eat or store in an airtight container after completely cooled. 
    If you like chocolate and mint or even mint chocolate chip cookies, then you will like these! I always use green food coloring so that the family knows that they are mint instead of regular chocolate chip cookies. Hope you enjoy!


    Love it? Hate it? Want to make it? Let me know what you think with a comment below!


    As always...
    Bon appétit!

                  Jan 17, 2012

                  Sweet n Sour Chicken: It's my birthday!

                  3-day weekends always seem to be the busiest for me. That is probably why I had to get up at 4 am (I left at 4:45 am) to drive back to school. I made good time and arrived on campus about 8:15 or so. I then had Environmental Sociology, which was interesting. We talked about nature and our relationship to it, our perceptions of nature, etc. It was something new that I hadn't ever thought about. I am currently waiting for my friend from Scotland who said he would be on at 11:30 am my time. Then again, scheduled times tend to be relative. So I shall just blog while I wait, haha. Oh, it's my birthday! Officially 22 o.o

                  An overview of my 3 day weekend.
                  Friday: too snowy to drive home, so I spent the night at the dorms.
                  Saturday: Had to be up at 5 am to go home. Roads were clear (thank goodness!). Dropped off my car to get new tires and later picked it up again. Played Plants vs. Zombies with my brother. Played Disney Quest with my brother and sister. My brother kept killing us!
                  Sunday: Slept in till noon. Went to Cheesecake Factory for my birthday dinner (no cheesecake allowed though!) and ordered the Fettuccine Alfredo with sundried tomatoes and chicken. It was alright, but I liked my moms' Thai Chicken Noodles better. Peanut sauce = mmmmm. Ate cake and opened my present. Played Plants vs. Zombies with my brother. Dropped my sister off for a sleepover.
                  Monday: Went to the doctor for a check up. Picked up my sister from her sleepover. Took a nap. Went to the grocery store. Made dinner. Cleaned up from dinner. Had leftover birthday cake. Took a shower and went to sleep.

                  That brings us up to date with my life right now. Of course, the Facebook birthday wishes keep rolling in. I wonder how many there will be at the end of the day, haha. I figured that all of you are probably ready for a break from all the sweets I've been posting, so I have the recipe that I made yesterday. Sweet and Sour Chicken! It was tasty, easy (it's done in the microwave!), and even though we didn't have pineapple, it was still delish. My brother had a double helping, while my dad and sister enjoyed their serving. I found out that my mom doesn't like sweet and sour chicken, but we still had leftover food, so she had steak and rice. I brought some of the leftover chicken with me, hehehehe. I hope you try this recipe out!

                  Sweet and Sour chicken (adapted from BBC Good Food)

                  Ingredients:

                  • 9 Tbsp. tomato ketchup
                  • 3 Tbsp. malt vinegar 
                  • 4 - 6 Tbsp. brown sugar (it depends how sweet you like your sauce. I added a little over 5 Tbsp.)
                  • 2 garlic cloves (2 of the "sections" of the garlic), crushed or finely chopped
                  • 4 skinless, boneless chicken breasts, cut into chunks
                  • 1 onion, chopped
                  • 2 peppers, seeded and chopped (I used one red and one green)
                  • 8 oz. can of pineapple chunks, drained (you can drink the juice!)
                  • 100 g sugar snap peas, roughly sliced, optional
                  • Handful of roasted cashew nuts, optional
                  Instructions:
                  1. In a large microwaveable dish, mix the ketchup, vinegar, sugar and garlic thoroughly. 
                  2. Add the chicken, onion and peppers and stir. 
                  3.  Microwave, uncovered,  for 8-10 minutes until the chicken is starting to cook and the sauce is sizzling.
                  4. Stir in the pineapple pieces and the peas if you are using them. 
                  5. Microwave for another 3-5 minutes or until the chicken is fully cooked. 
                  6. Leave to stand for a few minutes and then stir in the cashews if you are using them.
                  7. Serve while warm. (I served this with white rice)
                  Malt vinegar is able to be found in the stores. It might have a British flag on it, though. The other ingredients are easy to find. You can personalize this dish with other vegetables that you enjoy, as well!

                  Love it? Hate it? Want to make it? Let me know what you think with a comment below!

                  As always...
                  Bon appétit!


                  P.S. : My current band obsession is The Wanted. If you haven't heard their music, check them out!


                  Jan 11, 2012

                  A microwave brownie from scratch

                  I think I am becoming a cranky college senior. The people upstairs keep tapping on the heating unit and heating pipes, and then the sound is amplified into my room. I have started tapping really loud on the heater just to get a few minutes of peace. My next door neighbor has her loud friends over even more than usual, and it seems that she has their kids over plenty, too. She's nice, but when I can hear you returning to your room past 2 am and I hear "Hey gurrrllll..." I just want to hurt something. They have been warned before, but apparently the memo hasn't completely gotten through their heads. Ugh. Does this make me a grumpy senior student or just too observant? I haven't quite decided... Classes went well today. My media writing class felt like elementary school English class. We discussed differences between illicit vs. elicit, allude vs. illude, illusion vs. allusion, media vs. medium, and many more. It wasn't difficult, but my brain checked out quite often. Ugh, there goes the noisy hall people again. SHUSH PEOPLE! -.-

                  I read my chapter for environmental sociology. It was boring and I didn't really learn much other than the reason why the authors put the book together the way they did and what was in the chapters to come. They went over some history, but I don't think I care enough about that. I finally installed Itunes on my new computer. For some reason I thought I had already installed it, but I hadn't. Itunes is needed so that I can make a driving playlist for my round trip driving session. Seven to eight hours in the car in one day. Yay me. I also have to type up my idea sheet for the ACS meeting tomorrow. The meeting is why I have to spend so much time in the car, along with the fact that we have school on Friday, even though many other schools get a 4 day weekend. Unlucky us. I might try to get my reading done tonight or tomorrow, but it might have to wait till late tomorrow night or something. Pretty much life right now.

                  So, this recipe is one that I randomly found on Pinterest. I know that I have posted a microwave brownie recipe before, but this one doesn't use the boxed brownie mix. This is delicious and I honestly don't understand the complaints that are in the comments section. If you need a quick chocolate fix, this is for you!

                  Mug Brownie from scratch (from Instructables.com)

                  I added cheesecake dip and choco chips to my brownie. So good!
                  Ingredients:

                  • 4 Tbsp. Flour
                  • 4 Tbsp. Sugar
                  • 2 Tbsp. Cocoa powder (what you would use for baking)
                  • Dash of salt
                  • 2 Tbsp. Vegetable Oil (or any non-flavorful oil i.e. safflower, sunflower, canola, etc.)
                  • 2 Tbsp. Water
                  Instructions:
                  After stirring. It was still delicious!
                  1. Mix the first 4 ingredients together (dry ingredients).
                  2. Add the last two ingredients (liquids). 
                  3. Mix well. Try to get out many of the clumps.
                  4. Microwave for 30 seconds. Test and see if done.
                  5. If not done, microwave in 30 second intervals until it is done. It won't look done, but it will have more-done brownie on the edges and more gooey in the center. If you mix it together it will be just fine.
                  6. Add any toppings you would like (whipped cream, chocolate chips, etc) and enjoy warm!
                  I hope you try this out. It's simple and fast! I like it when I desperately need some chocolate in my life. If you want to see the recipe for the cheesecake dip, click here.

                  Love it? Hate it? Want to make it? Let me know what you think with a comment below!
                  As always...
                  Bon appétit!

                  Jan 10, 2012

                  Sugar Power!

                  Today was my first day of my Tues/Thurs class. I actually liked it a lot! The thing that I hate is all those introduction exercises tha
                  t the professors have the class do. Yes, they want to get to know you a bit and get you talking, blah, blah, blah... but they are so repetitive! Blargh. Ah well... I have one more "new class" tomorrow evening. Night classes. I like the professor though, so it should hopefully not be painful in any way. I will again have my three classes from Monday. Luckily, no homework for tomorrow, woot! I took a nap of epic proportions, but it makes sense because this week is one of those dreaded weeks... Yea...

                  Anyway, the recipe today is a very basic recipe that we whip out for Christmas. It isn't a difficult recipe, but it does take some time, especially since you have to roll out the dough and then use cookie cutters. My sister and I always look like the flour exploded on our clothes, but an apron can prevent that, haha. I hope you all try this out!


                  Christmas Cookies


                  Ingredients:
                  • 3 c. flour (plus extra for when you roll out the dough)
                  • 1 tsp. baking powder
                  • 1/4 tsp. salt (the finer kind... not sea salt!)
                  • 1 1/4 cup sugar
                  • 1 cup shortening (butter flavor or plain is fine)
                  • 3 eggs
                  • 1 tsp. vanilla extract
                  Instructions:

                  1. Pre heat the oven to 375 F or 190 C. (if I ever forget, here is the oven temperature conversion chart)
                  2. Sift the dry ingredients together (flour, baking powder, salt, sugar). 
                  3. Add the shortening to the dry ingredients.
                  4. Mix with a fork or a pastry blender. 
                  5. Add the eggs and vanilla. Mix well.
                  6. Lightly flour a flat surface to roll the dough on. Flour your rolling pin. Get out your cookie cutters and set them in a small pile of flour so that you can prevent the shapes sticking in the cookie cutters.
                  7. Take a chunk and roll it out. Cut the dough into shapes.
                  8. Bakes for about 8 minutes.
                  9. Let cool.
                  10. If you want to, frost and decorate your cookies. If not, then enjoy or store in an air-tight container.
                  I hope you all try this out. It really isn't difficult, but the dough rolling part could take a bit of practice if you have never done it before. If your dough is too sticky, make sure to flour really well, or the dough will stick everywhere. Good luck!


                  Love it? Hate it? Want to make it? Let me know what you think with a comment below!

                  As always...
                  Bon appétit!

                  Jan 9, 2012

                  Buckeyes (Think PB truffles)

                  Today was my first day back! My classes went well, and it doesn't seem like they will be killer classes. I gathered all my books, although I have to see if I still need to buy an online access code for my online class. I was so tired last night that I couldn't even function that well. I was making up sentences that were just... special... Tomorrow I have Environmental Sociology, which I hope is as interesting as it sounds. I have that class in the morning and then have the rest of the day to do work for my other classes. I am slowly getting used to this new laptop, but I LOVE the sound that this computer has. It's like they built really nice speakers in. So awesome. :) I got to eat dinner with my friends, but that was just sheer dumb luck. I had to go and pick up my books, but it was around dinner time. So, I went into the Union and I see my friends sitting at the table eating. It was awesome to see them again! I also returned the jeans that were stored in my closet over break. One of my friends moved out (she's going to student teach somewhere else) and her roomie moved out as well (she is going to Italy! So jealous!), but her roomie found my friends' pants in a drawer, accidentally left behind. I was asked to store them in my room after break and then return them today, which I did. It was nice to chat with her before she heads off on her teaching adventure. Even though it's weird to be at school, I know I will survive and that I can make it to the finish line!

                  The recipe for today is Buckeyes. Perhaps the people in Ohio are the only ones who call them that, but if you dip them correctly, they truly look like buckeyes. My sister and our neighbor absolutely adore these! Since we had leftover chocolate, we melted some PB, swirled it in with the chocolate, spread the chocolate out medium-thickness on wax paper and let it cool. So yummy! I hope you all give these a chance!

                  Buckeyes (recipe adjusted from this Allrecipes recipe)

                  Ingredients:

                  • 2 cups of Peanut Butter
                  • 1 cup of butter, softened and at room temperature
                  • 1/2 tsp. vanilla extract
                  • 4 - 6 cups confectioners sugar/powdered sugar (start with 4 and add more if needed)
                  • 4 cups semisweet chocolate chips (have some extra on hand just in case!)
                  Instructions:

                  1. In a large bowl, mix the butter, PB, vanilla and confectioners sugar. This mixture is your dough. 
                  2. Prepare a strip of wax paper on a cutting board/cookie sheet that will fit in the freezer.
                  3. Roll dough into 1 inch balls and place on the wax paper-lined surface. They will seem shiny and almost like thick cookie dough. 
                  4. Chill in the freezer until firm, about 30 minutes. (after they are firm, you can store them all in a gallon plastic bag if you want to dip them later)
                  5. Melt chocolate chips in a microwaveable bowl for 1 minute. Then go to 30 second intervals, stirring after every heating. When the chocolate looks glossy/fully melted (after stirring it), it is ready. 
                  6. Dip the frozen PB balls into the chocolate with a fork. If you want to make buckeyes, leave a little PB peeking out at the top. If not, just cover it all with chocolate. 
                  7. Put on wax paper to cool.
                  8. Transfer to an air tight bin and store in the refrigerator until serving.
                  9. Enjoy!
                  This no-bake dessert is easy to make and doesn't take very long, especially with some help! I hope you all try it out!

                  Love it? Hate it? Want to make it? Let me know what you think with a comment below!

                  As always...
                  Bon appétit!

                  Jan 8, 2012

                  Nut Filled Cookies

                  Quotes from today:
                  "Once around the river bend" (while putting away the Pocahontas ornament)
                  "Let's take the balls off of the tree" (mom meaning that the ornaments needed to come off the tree, although minds wandered somewhere else...)
                  "That sounded like you farted diarrhea in your pants!" "D.I.M.P. Diarrhea in my pants"
                  "Angry squirrels" (squirrels fighting over old corn muffin pieces)

                  It is my last full day at home. So weird. Tomorrow I leave for campus again. For my last semester. Ugh. I found out that my computer decided to delete some videos from my Ipod to "synchronize it" grrrr. I am fixing the issue though, and my sister luckily has them on her Ipod. I realized yesterday that I have about a week until my birthday! That sneaked up on me! I have no idea what restaurant I will go to or anything. I also have a big Relay for life meeting this week. Gonna be an interesting week! We get a 3-day weekend because of MLK day though. :)

                  The recipe for today was a new one this year. My mom apparently made them before, but she didn't think they tasted the same. I found the crust revolting by itself, but the cookie overall is decent. I give it an 8 out of 10 just because the crust is not yummy by itself... at all... Potentially, you could swap out a pie crust or a different crust if you wanted. I hope you all try this out!

                  Nut Filled Cookies 
                  We ran out of muffin cups, so I made a flat dessert too


                  Ingredients:

                  • 1/4 lb margarine or butter (1 stick)
                  • 1 cup flour
                  • 3 oz. cream cheese
                  Filling:
                  • 3/4 cup brown sugar
                  • 1 egg
                  • 1 Tablespoon margarine or butter
                  • 1 cup chopped nuts
                  • 1/4 tsp. vanilla extract
                  Optional:
                  • powdered sugar
                  Instructions:

                  1. Preheat the oven to 375 F or 190 C.
                  2. Take the first three listed ingredients (flour, cream cheese, and butter/margarine) and combine.
                  3. Shape the mix into 24 small balls.
                  4. Put mini-muffin cups in a mini muffin pan or a round pan.
                  5. Press the balls of dough into the muffin cups, working it up the sides to make a small cup.
                  6. Combine all of the filling ingredients.
                  7. Put 1 tsp. of the filling into each muffin cup or until 3/4 full.
                  8. Bake for 20 - 25 minutes or until edge is slightly brown.
                  9. Sprinkle with powdered sugar if you'd like. (I skipped that step)
                  10. Let cool and enjoy!
                  This isn't a difficult recipe to make, but it does take a little bit of time and some messy hands to get the crust all set up. After that is done, it's a breeze! Hope you all try this out!

                  Love it? Hate it? Want to try it? Let me know with a comment below. :) Please feel free to mention any changes you think could improve this blog. Thanks!

                  As always...

                  Bon appétit!

                  Jan 6, 2012

                  Coconut Macaroons

                  Nothing thrilling to report today. I stayed up all night and then went downstairs. I baked some biscuits, cooked some scrambled eggs, and assembled a breakfast sandwich. A little salt and a little pepper on the eggs gave fabulous flavor. I also added a slice of cheese because I adore cheese! How are all of you? Going strong with your resolutions? I know that I am pushing my resolutions back until I get back to school with my independence and a true schedule. My first week is going to be busy, but hopefully it will be exciting and feel fresh. I watched the "big show" for Wizards today. It was good!

                  Today is a day for something that isn't super-sweet. Yes, it falls under the dessert category, but it isn't a sickeningly sweet one. I really should have made a double batch of these because me and my mom gobbled these up within a week. Oops, haha. These are easy to whip up and are done in under 30 minutes! Definitely something to think about if you are in a dessert pickle. :) This is another one of those recipes that we only dig out for Christmas, but it is versatile! I hope you all try these out. 

                  Coconut Macaroons

                  Ingredients:
                  • 2 2/3 cups (7 ounces) Baker's Angel Flake coconut
                  • 2/3 cup sugar
                  • 6 Tbsp. flour
                  • 1/4 tsp. salt
                  • 4 egg whites
                  • 1 tsp. almond extract
                  Instructions:

                  1. Pre-heat the oven to 325 F or 170 C.
                  2. Mix the coconut, flour, sugar, and salt in a large bowl.
                  3. Stir in the egg whites and almond extract until well blended.
                  4. Grease or spray nonstick spray on your cookie sheets or cover with parchment paper/aluminum foil.
                  5. Drop the mixture by teaspoonfuls onto the cookie sheets.
                  6. Bake for 20 minutes or until the edges of the cookies are golden brown. 
                  7. Immediately remove from the cookie sheets and place on a cooling rack or on wax paper. 
                  8. Enjoy right away or store in an air tight container after they cool down.
                  Love it? Hate it? Want to try the recipe out? Let me know with a comment below!

                  As always...


                  Bon appétit!

                  Snowball cookies

                  Hola readers! Can you believe it is Thursday already? I sure can't! >.< It seems like the time at the end of my break just whooshes by! I have to drive back on Sunday. Haven't quite determined whether I will leave late morning or early afternoon yet. The bookstore closes at 5, but I might just wait till Monday to pick up my books. Decisions, decisions... I still find it weird that this is my last semester of college... like really weird. What if the real world doesn't like me? I mean, I am making a few plans, but nothing is set in stone. I am just crossing my fingers and hoping that something works out. Life tends to throw curve balls, so we shall see what happens! Anyway, since I stayed up till 8 am, I slept till 3 pm. Blah. My messed up sleep schedule needs fixing! Currently I am snacking on dark chocolate M&Ms and am hoping that my mom enjoyed seeing Twilight by herself, because I politely declined. Didn't really do much... just watched Wizards of Waverly Place for a few hours. Is it weird that I am looking forward to the big episode at 8 pm? Perhaps it just reveals how much I love disney. Nerd!

                  The recipe that I have for today is from one of the cookie books that my mom has used for a long while. She's had it so long (perhaps it was passed on to her?) that the pages are falling out. It's difficult to even find recipes because the index is in a different chunk than the rest of the stuff. Needless to say, the poor book should really just have the recipes ripped out of it that she wants. The recipe for today has nuts in it. The cookies are called snowballs because they kind of look like snowballs. Even more so once you cover them in powdered sugar!

                  Nutty Snowballs


                  Ingredients:

                  • 6 Tbsp. sugar
                  • 1.5 sticks of butter/margarine, softened
                  • 2 Tbsp. ice water (very cold water works)
                  • 2 tsp. vanilla extract
                  • 2 1/2 cups flour
                  • 1 cup of nuts, chopped well
                  • 2-3 cups of powdered sugar
                  Instructions:

                  1. Pre-heat the oven to 300 F or 150 C. 
                  2. Cream butter and sugar.
                  3. Add the rest of the ingredients (add the nuts last!) and mix to form a dough. This might be a bit stiff. 
                  4. Prepare your cookie sheets by greasing them (with butter or cooking spray) or lining them with aluminum foil or parchment paper.
                  5. Shape into bite size balls and place on your cookie sheets.
                  6. Bake for approximately 30 minutes. They are ready when the bottoms are golden brown. 
                  7. Let cool down a bit. While still warm, roll in powdered sugar. 
                  8. Store in an airtight container or enjoy right then!
                  Love it? Hate it? Want to try it? Let me know with a comment below!

                  As always...


                  Bon appétit!

                  Jan 4, 2012

                  7 layer bars

                  Hmmm... today... Well, my mom was going to take me to see Twilight, but there weren't any afternoon showings. Oh well... My sister made me go with her to pick up her cookie form thing, even though the place was easy to get to, she "forgot how to get there." How convenient... The nice thing is that we (my brother, sister, and myself) went to Target and Best Buy. I finally bought a personal blender, along with some pens for my friends, some Annie's snack mix (click here for their site), and a salad dressing emulsifier which came with two recipes for dressing! Yay! I am super excited about using these products in the dorm. Should be interesting to see what creations I come up with! I also recently acquired a popsicle mold and a VCR player. Woot! I will have plenty of stuff to take to campus, but it will be worth it! :)

                  This recipe is one that my mom has had for a while. We always make it at Christmas, but apparently the way I made it this year wasn't up to her standards. I don't really understand how it could be messed up since it's one of those "slap it all together and let it cook" sort of recipes, but she complained regardless. I guess next time I will use the 9 x 13 pan that she told me I should have used (ya know, after they were done...). I think another problem is that I forgot to grease the pan. I don't know if that would have really helped or not, but it's the only other thing I can think of. Anyway, I hope you all enjoy!

                  7 layer bars 

                  Ingredients:


                  • 1 stick margarine or butter
                  • 1 1/2 cups graham cracker crumbs 
                  • 1 pack chocolate chips 
                  • 1 pack white chips
                  • 1 pack butterscotch chips
                  • 1 can sweetened condensed milk
                  • 1 cup chopped nuts (whatever type you like)
                  • 1 cup coconut (you can add a bit more if you wish)
                  Instructions:
                  1. Preheat the oven to 350 F or 177 C.
                  2. Melt the butter/margarine in a small, microwaveable dish. 
                  3. Measure out the graham cracker crumbs and spread them out in the pan.
                  4. Using a spoon, drizzle the melted butter/margarine over the crumbs.
                  5. Using your fingers, mush it all together and make a crust. 
                  6. Pour the nuts on top of the crust, then the chocolate chips, butterscotch chips, and white chips. Top that with the coconut and then pour on the sweetened condensed milk.
                  7. Bake for approximately 30 minutes or until the coconut is lightly browned and chocolate chips are somewhat melted. 
                  8. Enjoy!

                  Well, let me know what you think! Love it? Hate it? Tell me with a comment below!


                  As always...
                  Bon appétit!

                  Jan 2, 2012

                  Fabulous Fudge

                  Today was lazy. It's weird thinking that I go back to school next week. I hope you all have had a great new year so far. I have made a few resolutions and I hope I will stick to them. I got a few gift cards the other day that I need to use. Guess this week will be shopping and such. :)

                  Well, anyway, the recipe that I have today is one that's fast and easy! It is just a bit of time in the microwave, pour into the mold, and then let it set before it is ready to eat! I hope you all enjoy!

                  Fabulous Five-Minute Fudge (from Better Homes and Gardens)

                  Ingredients:

                  • 1 12-oz package of semisweet chocolate pieces (2 cups)
                  • 1/2 14-oz can of sweetened condensed milk 
                  • 1 Tbsp. water
                  • 1 tsp. vanilla extract
                  • 3/4 cup chopped nuts (optional)
                  Instructions:

                  1. Line a cookie sheet (or a square/rectangle dish) with waxed paper; set aside.
                  2. In a medium microwave-safe bowl, combine chocolate pieces, sweetened condensed milk, and water.
                  3. Microwave, uncovered, on 100% power (high) for 1 minute; stir. Microwave about 1 minute more, or until chocolate is melted and mixture is smooth, stirring every 30 seconds.
                  4. Stir in nuts and vanilla. 
                  5. Pour mixture onto prepared cookie sheet and spread it into a 9x6-inch rectangle, or drop mixture by rounded teaspoons onto prepared cookie sheet.
                  6. Chill fudge about 30 minutes or until firm. Cut fudge into 1-1/2-inch squares. Makes 24 pieces.
                  I hope you all try this recipe out! You can even use a different type of chocolate chips to spice it up! As always...


                  Bon appétit!

                  Jan 1, 2012

                  Happy New Year


                  Happy new year, everyone! Yay 2012! I am looking forward to hitting the 100 entries mark! This new year will be full of recipes and hopefully more main course dishes! I am also planning to start recording (on video) some recipes for you all to enjoy! Lots to look forward to! Thank you for reading. I look forward to sharing more fun food with you all. :)

                  Bon appétit!